
How to Format & Upload an image
Now that you have some background information, we’re going to put your image on the WordPress site.
There are three parts to the process:
- “Optimize” or manage the file size
- change the “scale” of the photo and
- change the pixel depth to 72 ppi
- make sure it’s around 500 kilobytes (half a megabyte) for optimal web display.
- Save in the right format. (usually .jpg or .png)
- Upload to a post or a page in your WordPress site.
1. Optimize the File Size
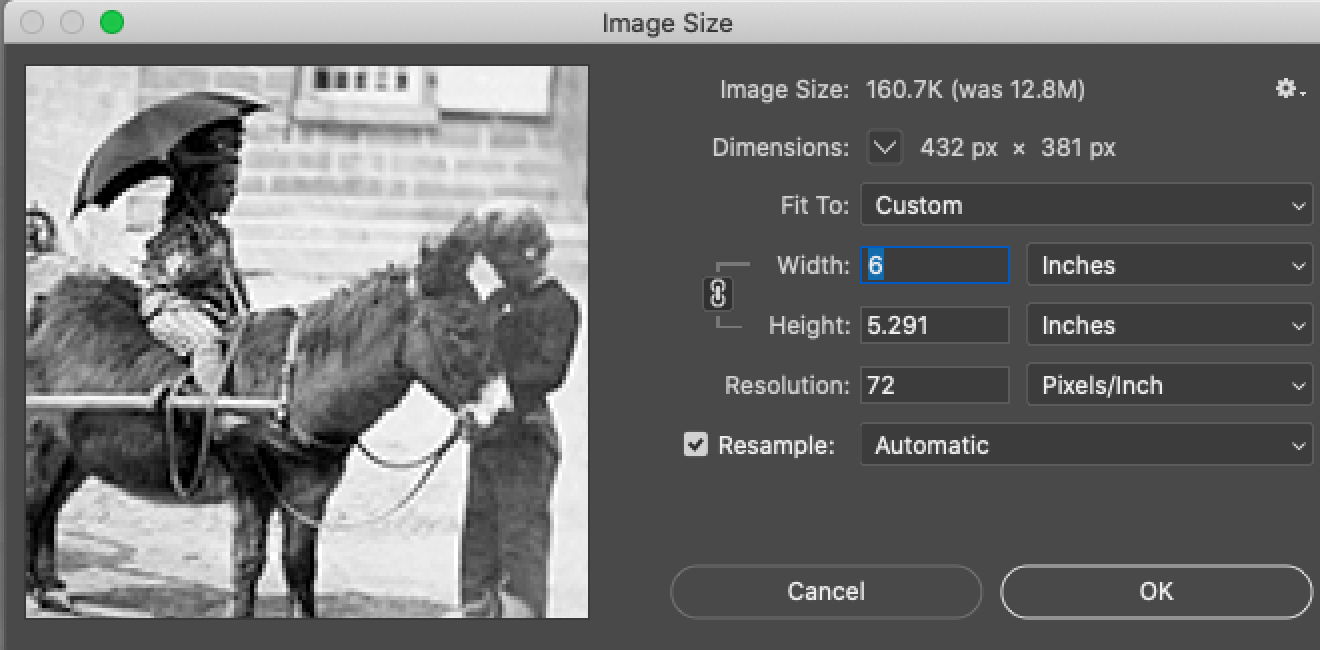
Image after adjustment

Image too large
In Photoshop, file sizes are controlled through a box called “Image Size” under the top file menu “Image.” In this example, you’ll see a “file size” of 12 M (12 megabytes) with dimensions of about 4 x 4 inches and a resolution of 1,000 pixels/inch. This is all wrong for display in web browsers. What you need is a file size less than 400 K and resolution of only 72 pixels/inch. When you type in 72 in the box where it says 1000, you get dimensions that are now rather small, so we adjusted the dimensions back up to about 6 x 6.
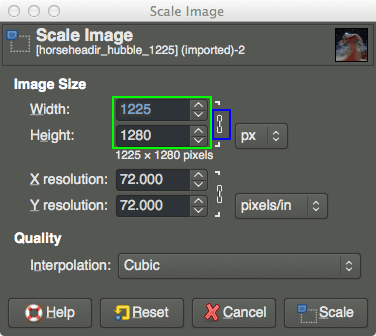
Changing the scale in Gimp
It’s about the same in Gimp. The dialogue box looks like this and you just make sure you have a 72 ppi resolution and then take the size down to where it’s manageable. Again, you want to be more or less under 400 K.
2. Use the right format

Photoshop format dialogue box. Its pretty much the same in Gimp except instead of “save as” you use “export.”
The process is pretty much the same in Gimp and Photoshop.
- Pull down the “File” menu from the top
- Then release on “Save As” or “Export” in Gimp.
- A dialogue box like this one appears.
- Pull the format bar down (or up) until you find your image format (here is Example1.jpg). Find .jpg or .png for photos, .gif for simple color display.
- Then decide where to save it. (“Desktop” is always handy)
- Then hit the save button at the bottom left.
- Next, decide what quality you need. Remember, the higher the quality, the larger the file size.
- You now have two files — your original (.xcf or .psd) file and your .jpg or .png file that was edited for the web. This is the right strategy, since your original file psd or xcf file will save layers and other features that won’t be saved with an exported jpg or png.
3. Upload to a WordPress page or post 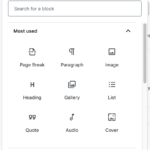

Almost everything you see on a WordPress portfolio site is placed on a page or a post. In COMS 226, where we want to display assignments on your portfolio site, you create a new page or post and then add images or other items.
When you create a new page or post in WordPress, you’ll see a toolbar with the image icon. Sometimes the toolbar is at the top of the editing area. Open it and a menu opens. It lets you insert all kinds of items, including photos. So click on “image” and it will take you to your media library, or an upload browser. Find the image, click on it, and upload it to your media library. Then insert it on your page or post, and then be sure to save your page or post.