
An Oct. 24 video explaining this exercise was uploaded to YouTube
Ex. 4.1
Open Adobe InDesign and select the “New” button. Let’s start with a Tabloid – 66 x 102 picas. (11 x 17 inches). Select “Tabloid” and “create.”
Note the standard measurements:
- A pica is one sixth of an inch, and is the usual space between columns of text, which is called a “gutter.” So 6 Picas = 72 points = 1 Inch
- Points are usually used for headline sizes. 72 points or 12 Points = 1 inch. Points are used mostly in increments of 6, as in 12 pt, 18 pt, 24 pt, 30 pt, 36 pt. 42 pt, 48 pt, 60 pt and 72 pt.
In the top menu, under “Layout,” open “Margins and Columns”.
You’ll see a Margins and Columns dialogue box.
Your margins should be set at 0.5 inches all around. Your column gutters should be 0.1667 inches, or one pica.
You can also specify how many columns you want on the page. For now, let’s choose two columns. And that’s the only thing you need to change (for now) in margins and columns.
Now there are three basic things you can do on this page, and they usually happen in this order:
- “Place” art or photos (File / Place)
- Write headlines in text boxes (Toolbox, Type Tool).
- Import body text (File / Place) or create dummy text (Type / Fill with placeholder text).
Before we get to work, check your top level menu “Window” and then follow “Workspace” and release on “Printing and Proofing.” This just ensures that we will be using the same menus in this exercise.
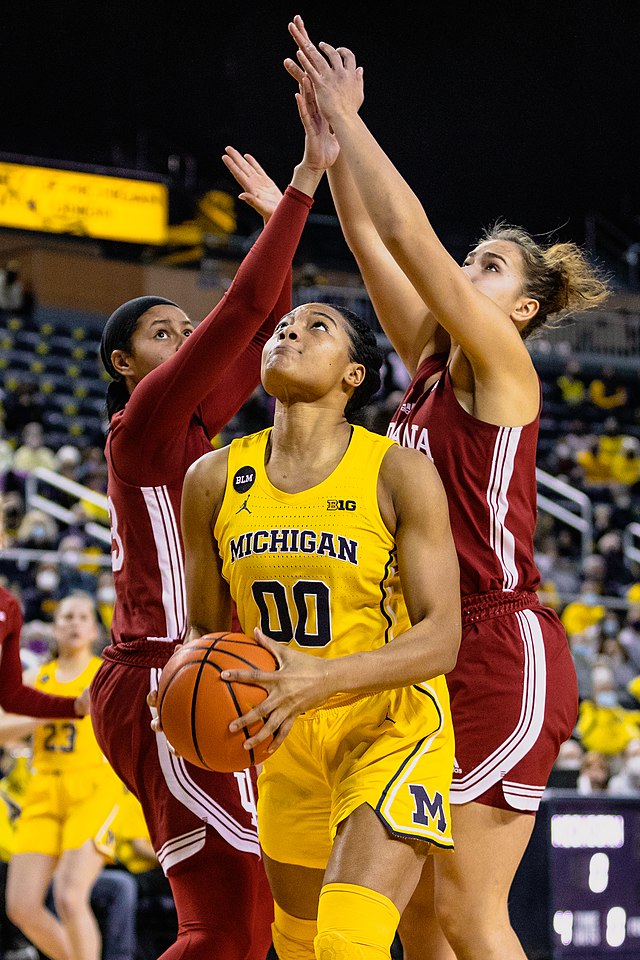
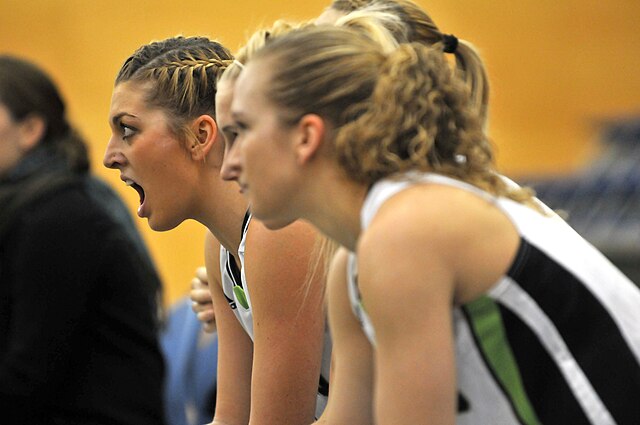
- Place photos — We’ve picked two basketball photos from Wikimedia Commons for this demo. One is a strong horizontal and another is a strong vertical. You’re welcome to add more from public domain sources or your college team.
So, put these photos on your desktop, go to File / Place, find the photos and place them on the tabloid page.
2. Moving the photos:
You can move the photos on the page using the top Selection Tool (black arrow) so long as you click on the edges of the photo or the frame. You can move the photo inside the bounding box with the direct selection tool (white arrow).
3. Resizing the photos: At the top of the working space, just under the main menu, there is an Application Panel that changes with the tools you use. (Photoshop has a similar options bar at the top). From left to right you see the “Reference Point” the “x,y location,” the width and height commands, and the horizontal and vertical scale percentage with default values of “100 %”. Use this scale tool here, pulling down on the marker, and try the appropriate percentage to resize the photo. It will take some experimenting. (There are also rotation, color fill and color line boxes, and other effects that will show up when you roll your cursor over them.)
![]()
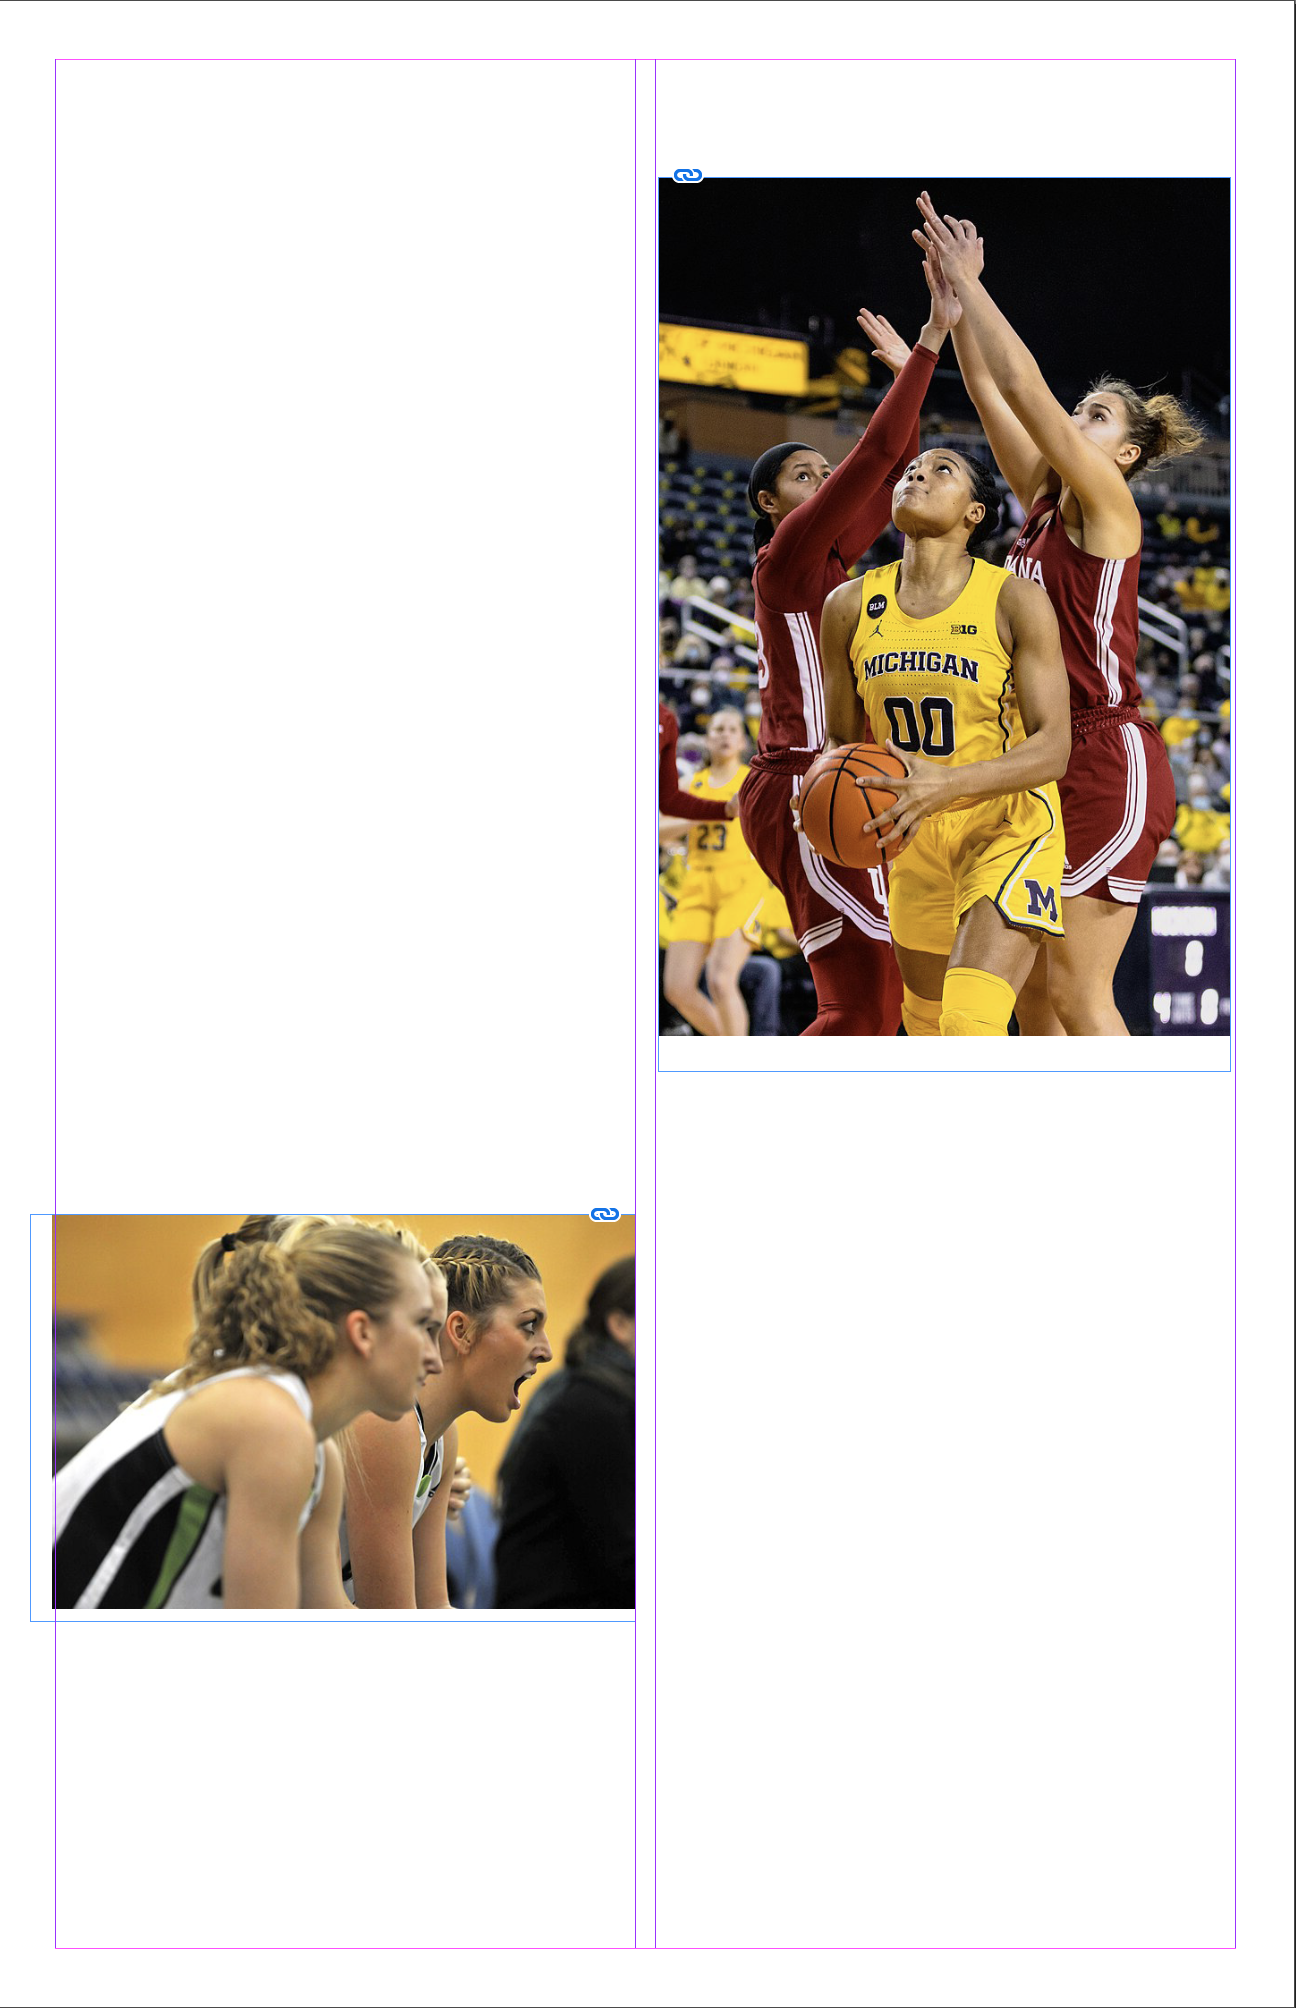
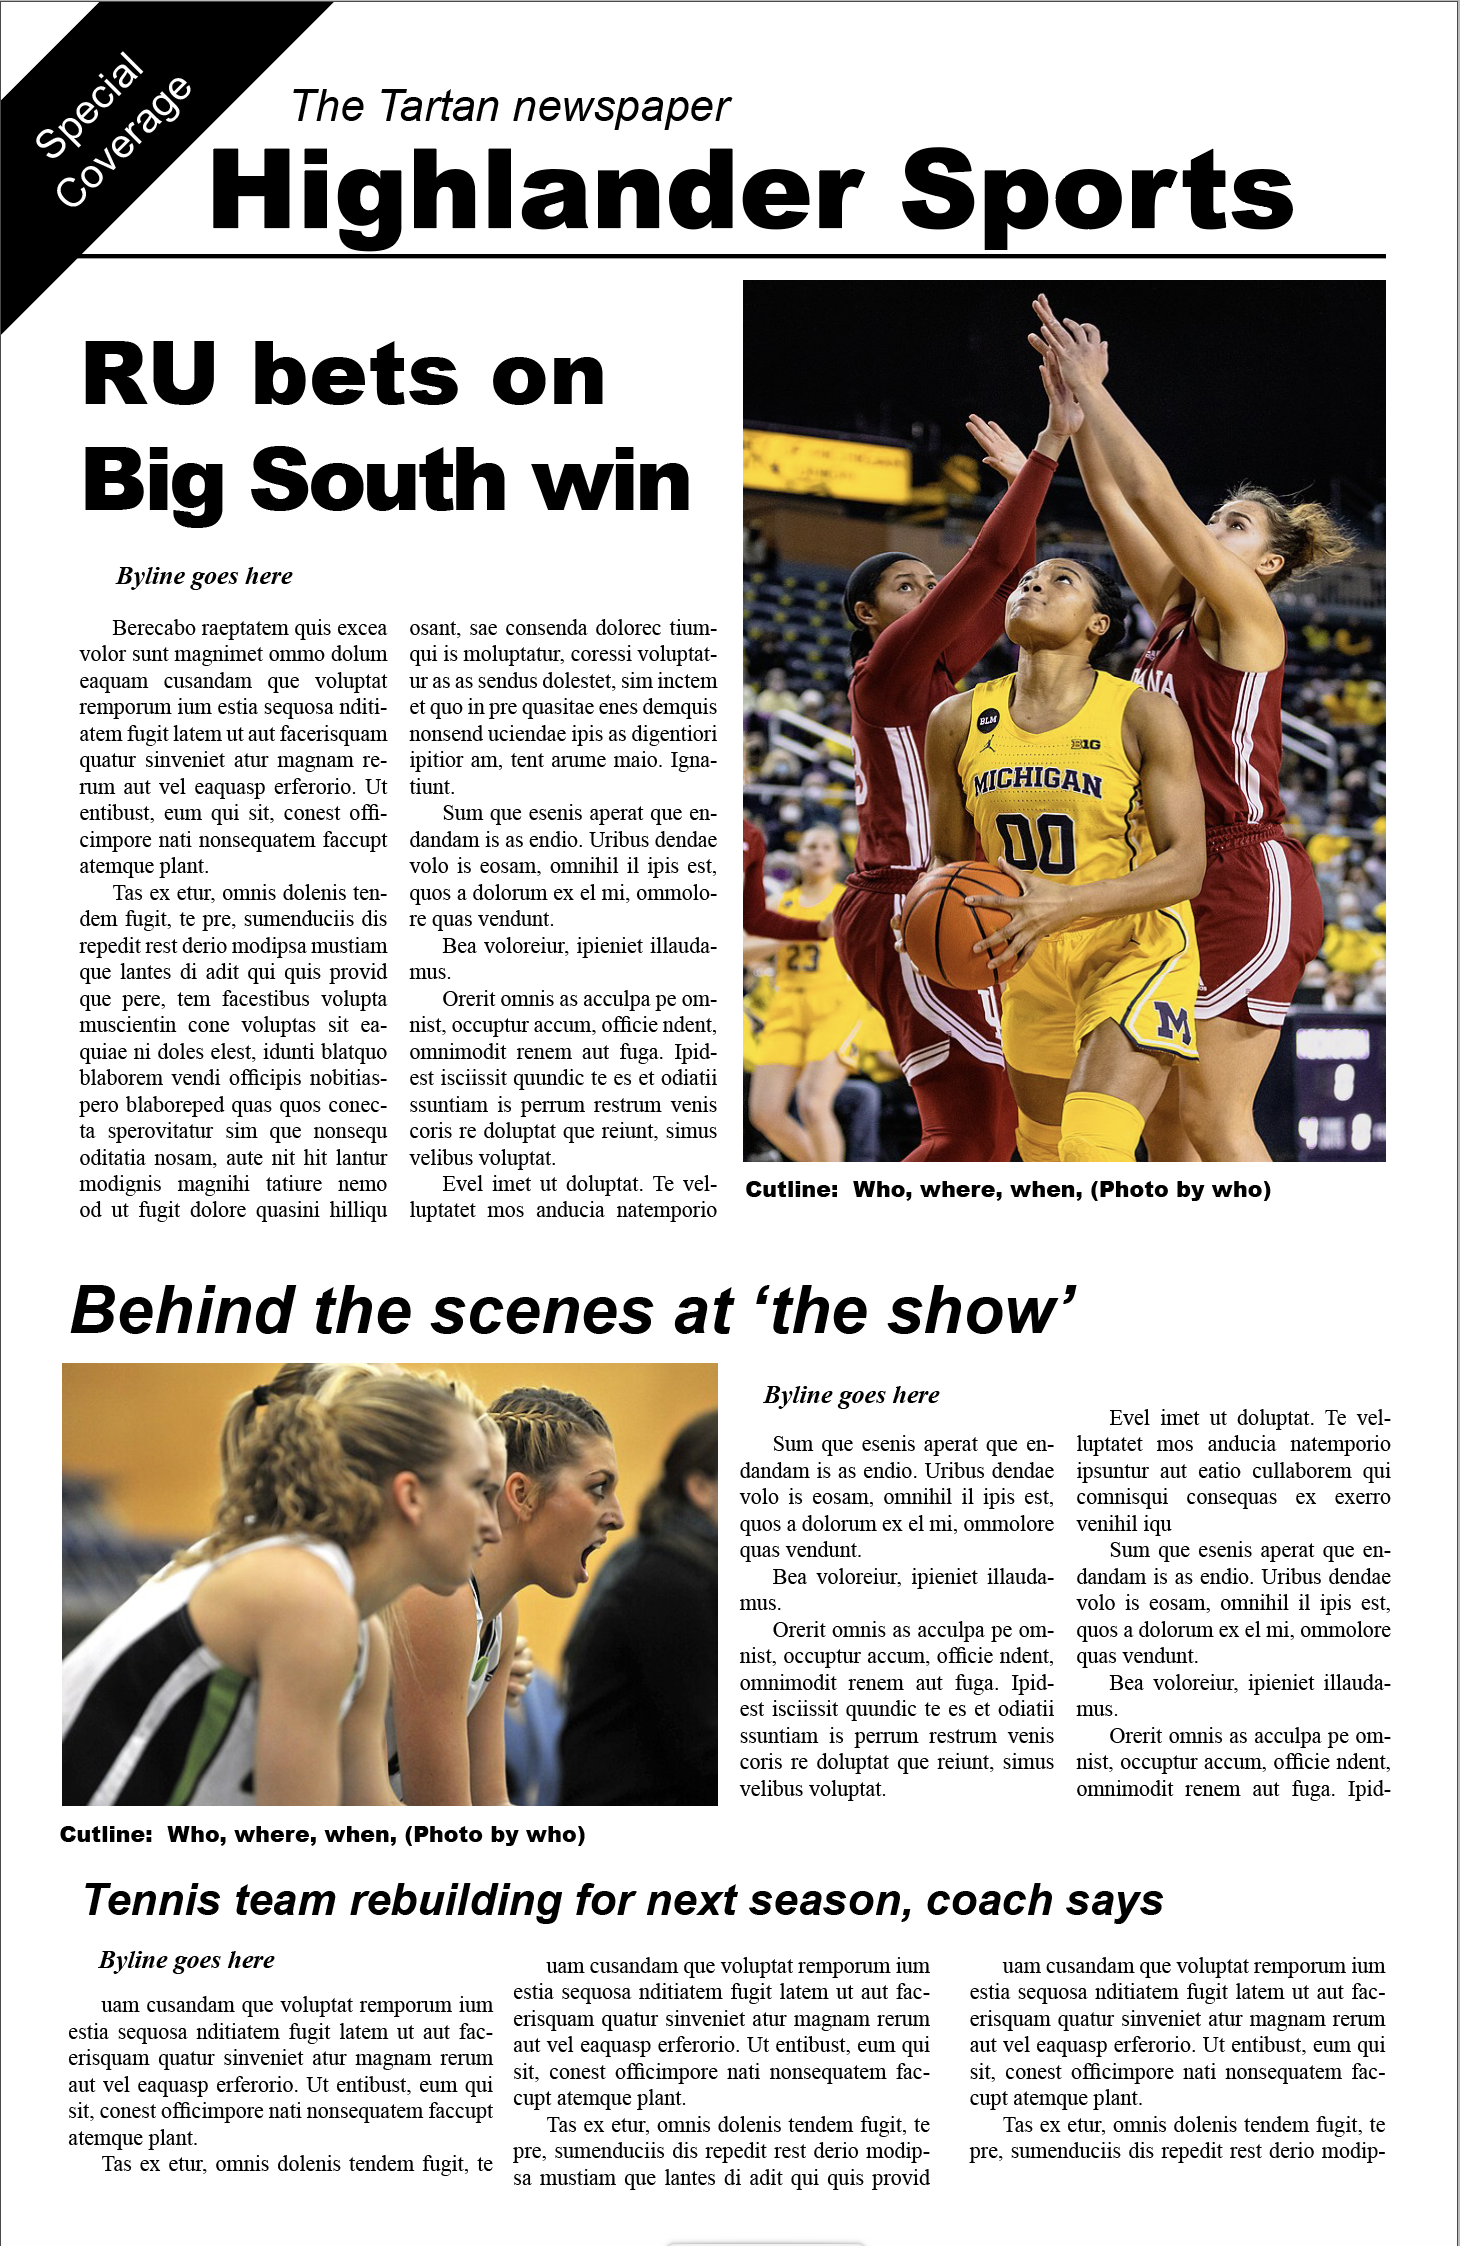
4. Pick the vertical of the Michigan player about to make a jump shot and move it to the right side (so it faces left). Size it to one and a half columns. Then pick the horizontal of the players on the bench, and size that to one column below the vertical. Flip it so the players are facing right.
Now your page should look more or less like this:
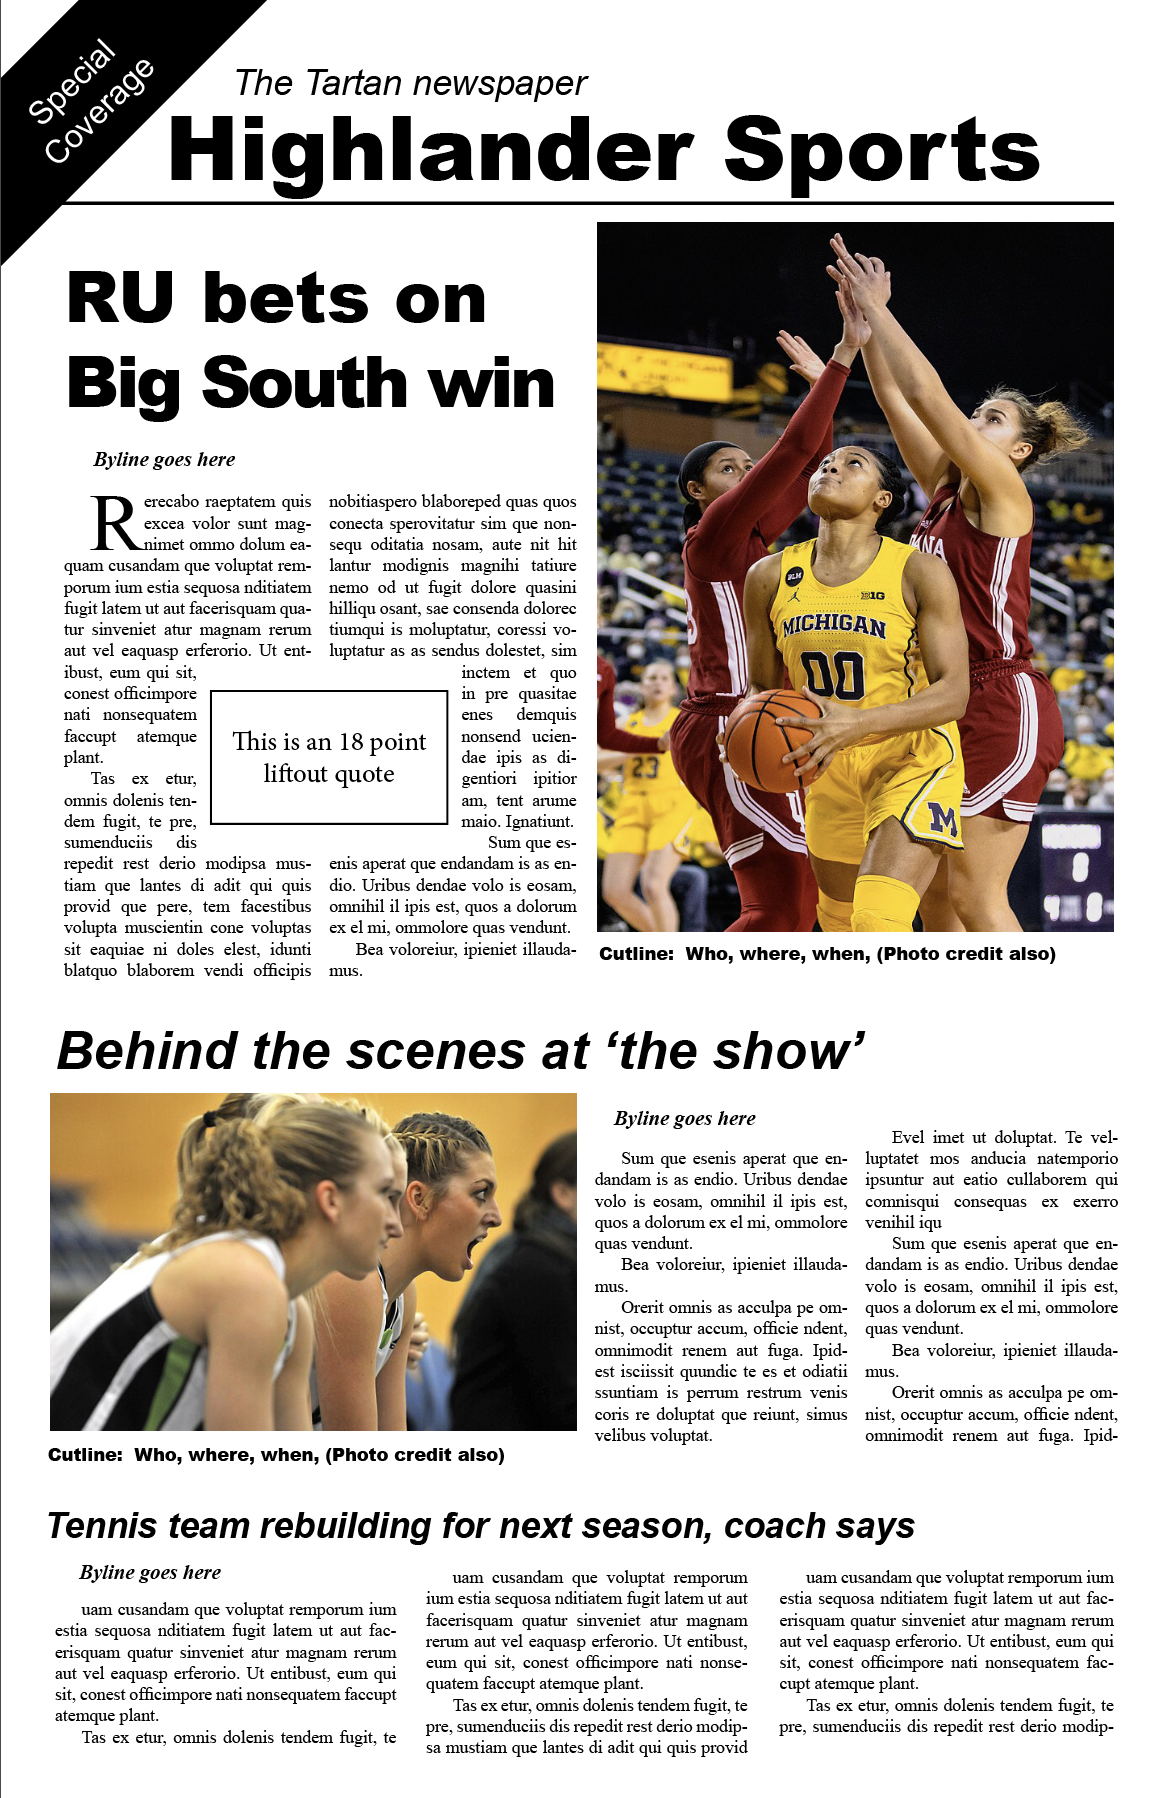
5. Now add a “Flag” at the top (‘Highlander sports’ is 60 point Arial bold) and maybe a smaller “kicker” (‘The Tartan newspaper’ is 24 point Arial italic)
6. Now write three headlines for the top, middle and bottom stories on the page. They should be larger at the top. Here we have 48 point, 36 point, and 24 point top to bottom.
7. Click and drag the body text boxes into place, and then import from docx or txt formatted documents, or fill with placeholder text (under the main Type menu). Add other elements like bylines and cutlines.
You can also use the right-click mouse menu on the body text boxes to change from one to two columns. Select “Text Frame Options” and just change to 2 columns.
8. Create a “reverse” (white text on dark background) 45 degree ribbon on the left side. First make a text box and write your text inside. Then highlight the box with the Selection ( black arrow) tool. Go to the Application Panel at the top of the working space and select colors in “Fill” and “Stroke” (stroke is the line around the object). With the box still selected, place your cursor next to one of the small “handle boxes” on the text box and turn it 45 degrees. Now go back to the text tool, highlight your text, and change change the “Fill” in your text to white. Then drag the reverse ribbon into place. It will overflow but will look fine when you shift the view from “normal” to “preview” (which is how it will look when you export the pdf.
Now your page should look like this:
You can do more to jazz up the page, but not too much.
9. Add a Drop Cap by highlighting the text box and clicking on “drop cap” in the paragraph styles pallet.
10 Add a lift-out quote. Just create another text box, increase the text size to at least 16 points, and open the Text Wrap pallet. Be sure to give it a pica of white space. The inside of the box also needs a pica of white space. Click on the liftout quote box, using the right-click menu “Text Frame Options,” and set the inset to one pica.
More
InDesign tutorials from Adobe:
Story Design presentation by Tim Harrower.
Objectivity presentation by Harrower