Assignment 7.1 Animation
There are several ways to create a small, simple animation.
For now, let’s use Gimp and then Photoshop.
One great Gimp animation tutorial is by Michelle at Tutorial Time
The technique is to make an object move across multiple layers, then go to Filters / animation / playback to test your animation. Then from Gimp, export as a .gif and upload into your wordpress site.
Here’s another Gimp animation tutorial.
Photoshop has a more complicated animation function. In this exercise, we are going to create a simple frame animation in Photoshop with a .gif file as the end product.
We’re using one of the Internet Advertising Bureau standard formats. Be sure to regularly save your work as a .psd file as you go along. In the end, we will have two files — your original .psd Photoshop file with all the layers and the .gif file. It’s important to realize that the .gif file can’t be changed, so we also hang on to the .psd file in case we need to go back and change something.
So here you go:
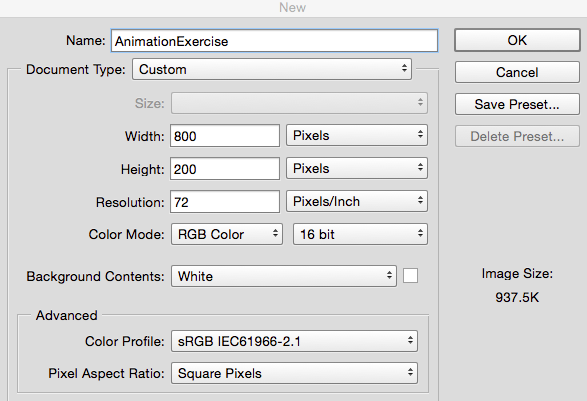
- Create a new file, in Photoshop. We’ll use an Internet Advertising Bureau standard header dimension of 8×1. (So 800 by 100 pixels), with 72 pixels per inch Resolution. (Caution: make sure you are using pixels, not inches. 800 inches width creates a one gigabyte file, which is way too big).
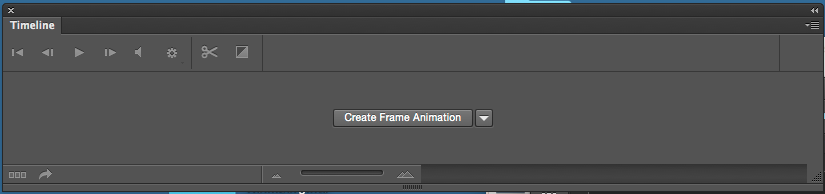
2 . Open Window (top menu) / Timeline. You will see a button with either “Create Frame Animation” which is what you want, or “Create Video Animation,” which is not what you want in this exercise. Pull down on the side tab to change between the two animation types. When you have “Create Frame Animation,” click on the button.
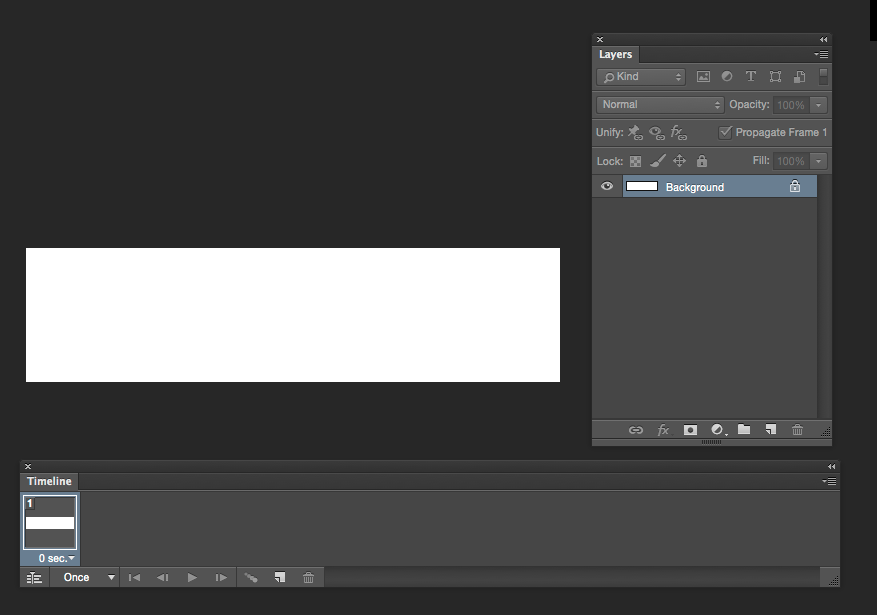
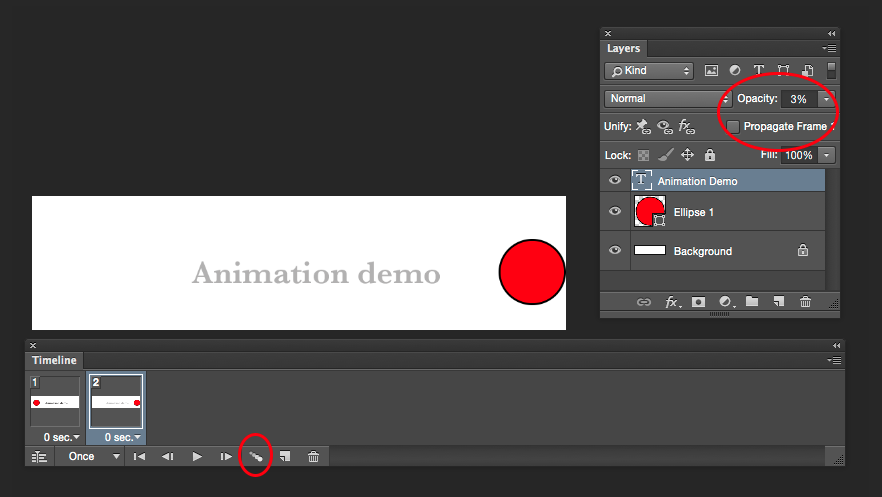
3. Layers pallet should also be open now. Your Photoshop working space should look more or less like this now:
4. Draw a circle and place it in frame 1. Also write some text in Frame 1. These should show up as two different layers in the Layers pallet.
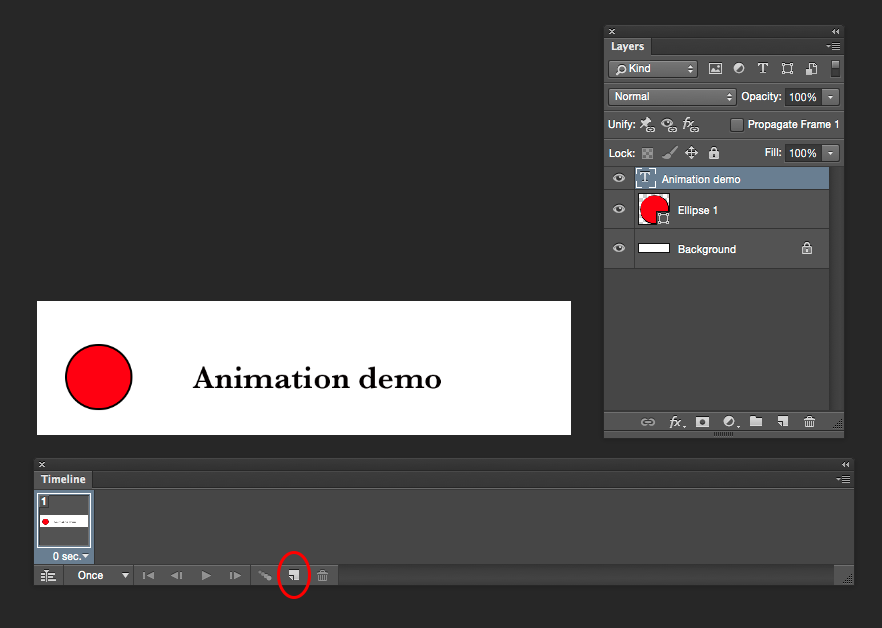
5. Duplicate frame 1 using the “duplicate frame’ button with the thin red circle above. Now you should have two frames.
6. Move the ball in frame 2 to the right side using the move tool. You’ll need to be sure that you highlight the layer you’re changing. Now, also in frame 2, switch to the text layer. In the layers pallet area with the thin red circle, below, you can see that we’ve decreased the opacity from 100% to 3% or less. Also, in the thin red circle area, sure that the checkoff box “Propagate Frame” is not checked.
7. Now click on the “Tween” button on the Timeline (3rd over from the trash can). You’ll get a dialogue box that looks like this. Add 10 frames for this exercise.

8. The final timeline should look like this:

Notice that we have selected all Timeline frames (Use the pull-down menu on the upper right side of the Timeline). With all selected, we can use any frame’s pull down menu to change the duration of all frames — In this case, from “no delay” to 0.1 seconds delay. We have also changed the “loop” from “Once” to “Forever.”
9. Save your .psd file
10. “Save As” your .gif file This is under File/ Export/ Save for Web (Legacy). Here’s the dialogue box you want:
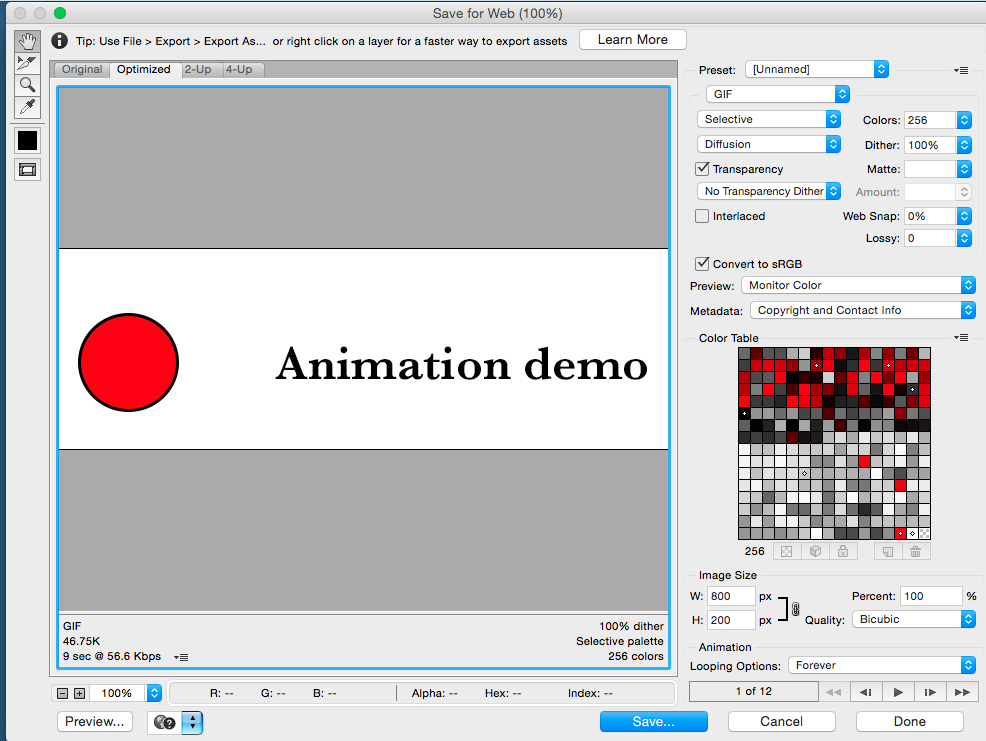
Notice the “GIF” format tab in the upper right, and also the video player buttons in the lower right. The animation should be working at this point. Be sure you have the .gif suffix on your file name as you save it. When you upload it, the animation should look something like this: