
Create Pages and Posts in WordPress
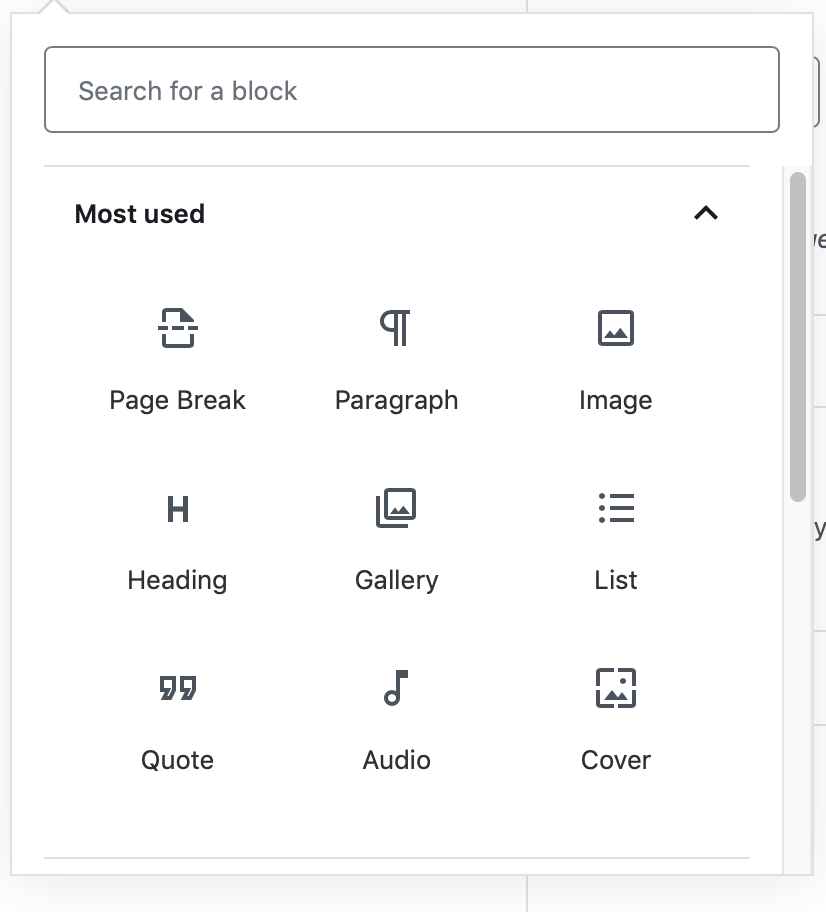
Dialogue box for adding images and text blocks and other items.
Now that you have a portfolio site up, what’s next?
Almost everything you see on a WordPress portfolio site sits on a either a page or a post. These are like the visible islands, and the pictures and text and video embeds and other things sit on top of them like palm trees and beach chairs.
Log in
Use the login name and password you just created in WordPress.com. You will also be asked to confirm your email address. Then, on the left hand side, you should see a link
1.2.1 Create your first post.
On the Dashboard, click on “Site / Post / Add Post.” (You may get a set of templates for the post, which you can use, or you can just select a blank template.).
The first thing you’ll see is a block for a headline that says “Add title.” Write something there, and then below on the right there should be a black box with a white cross. Click there and you’ll see a Dialogue box. If you click on the image icon, it will give you some choices.
- Upload from your computer. OR
- Media library, to place images already uploaded OR
- URL for inserting pictures from other sites without having to download and upload them.
Make a text block:
While still highlighting the picture area, click on the black square again and add a text block, represented in the dialogue box with a paragraph sign. Then, if you click on the picture again, the toolbar will show up, and you can use the text flow button to direct text flow around a picture, and also a link button that lets you link the photo to other web sites or to itself. Linking a photo to the media file, that is, to itself, lets you make the photo small on the page but clickable for enlarging. This is actually very useful.
1.2.2 Upload an image (jpg or png format) to your portfolio site:
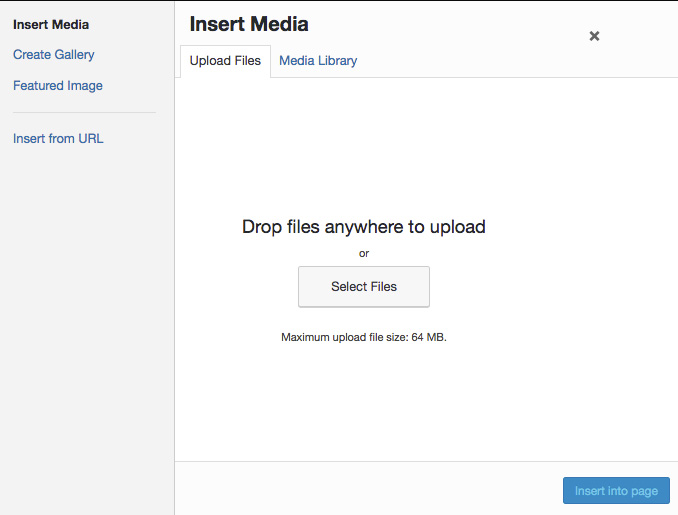
Insert media dialogue box, WordPress Content Management System
- In a WordPress system, you have to create a page or a post before you can place a photo. (You already did this ) So, open or create a page or post in WordPress.
- Look for a the “add media” button in the upper left. Sometimes it will be inside a circle or a square with a cross. Once you click on the button you will see a dialogue box for “insert media.”
- Select one of several ways to add the media:
- Add something that is already in your library (Select “Media Library” on the tab)
- Upload something new to your library — This is the usual thing you need to do with a new web site. Click on the “Select Files” button in the middle of the box, which then brings up a browsing box that lets you find the file to upload. Then the file is added to your Library and you can use it once or many times.
- Link via URL reference to a photo already on the web. Be careful with Wikimedia URLs, by the way. Usually you need to click twice on them to get to the Uploadable page ( “https://upload.wikimedia.org” ) NOT this: https://en.wikipedia.org/wiki/George_Washington#/media/File:Gilbert_Stuart_Williamstown_Portrait_of_George_Washington.jpg
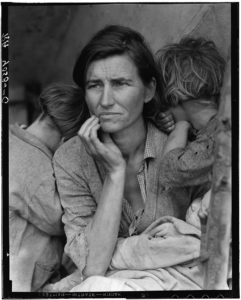
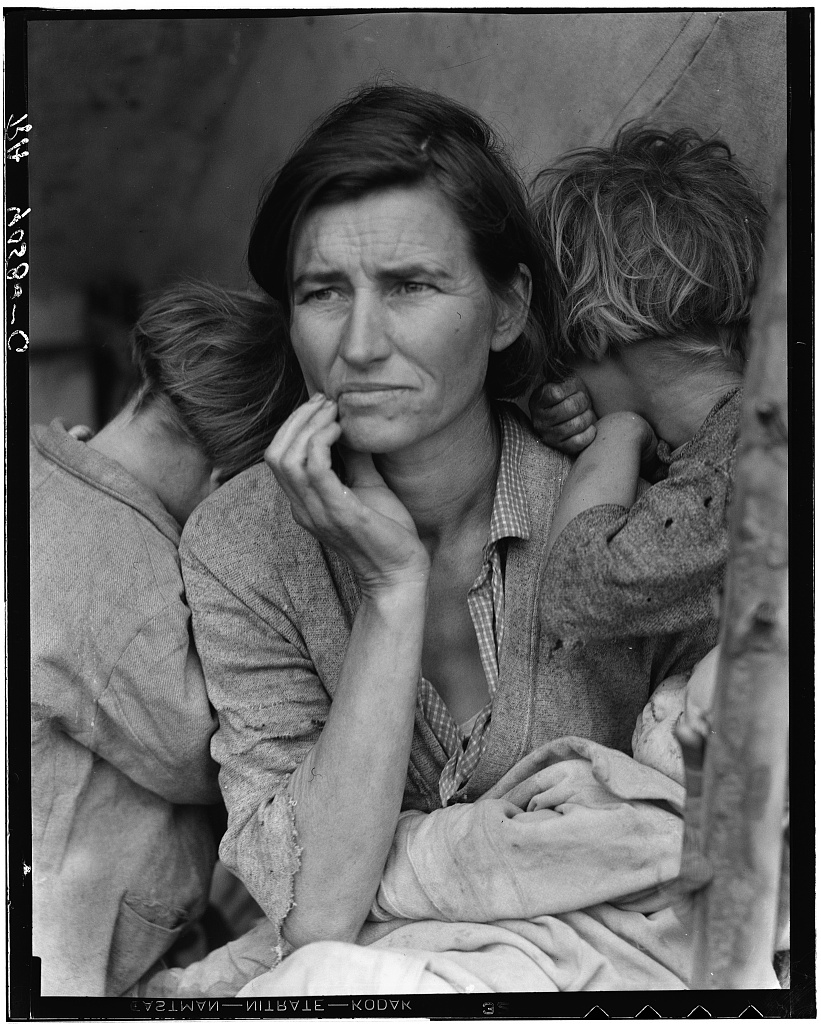
- Try this with a public domain photo such as the famous “Migrant Mother” photo by Dorothea Lange. The photo is at the Library of Congress and is available in a variety of sizes. Select one of the “jpg” formats, which are less than 400k. The 58 mb “tiff” version of the photo is too big, and not the right format.
1.2.3 Design & customize your site
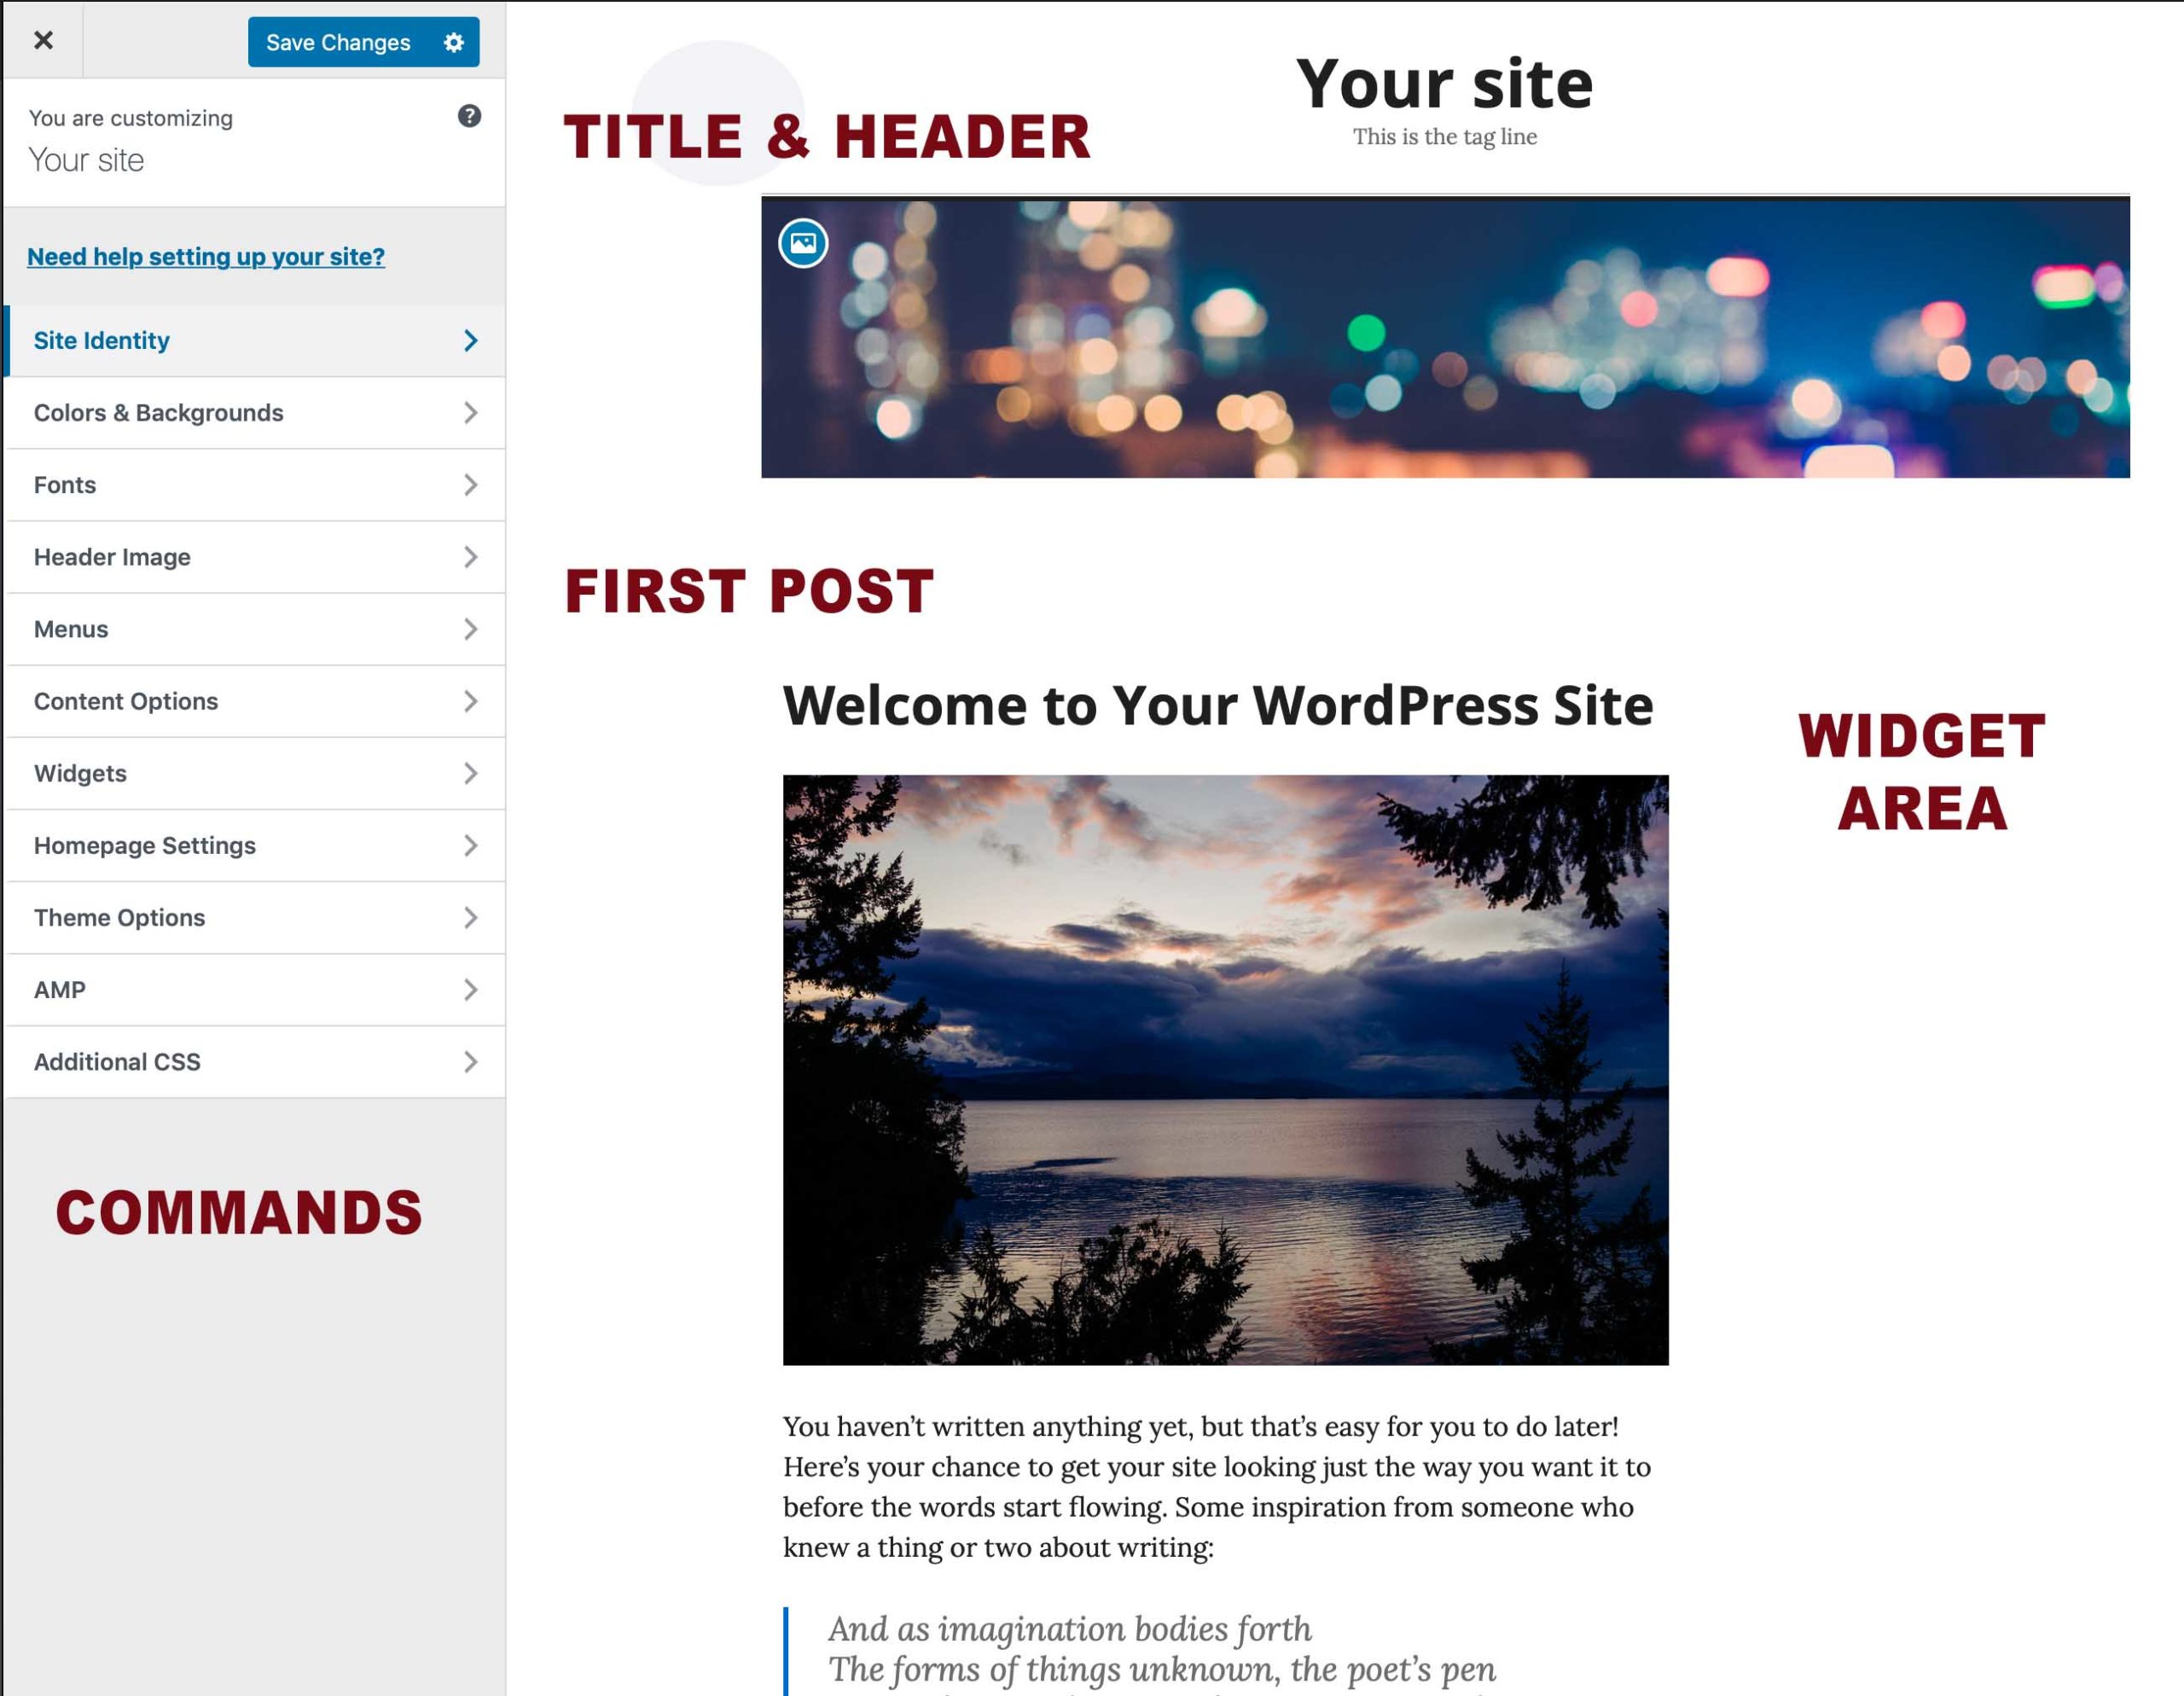
Design Dashboard with labels in red.
- Title and Header: If you click on “Site Identity” you can change your Title and tagline. So I have “Your site” above and Im going to change that in Site Identity.
- Homepage Settings: Select “Your latest posts.” Don’t leave it on “static page.” This can be changed later but it’s much easier to start this way.
- Colors & Backgrounds : The temptation is to use loud colors, but the most basic rule is legibility. Your site should be easy to read, and the design should highlight but not take away from the content. For more about this first principle of legibility in graphic arts, read the short essay “The Crystal Goblet” by Beatrice Warde.
- Fonts: For now, it’s easiest just to leave these on “default.”
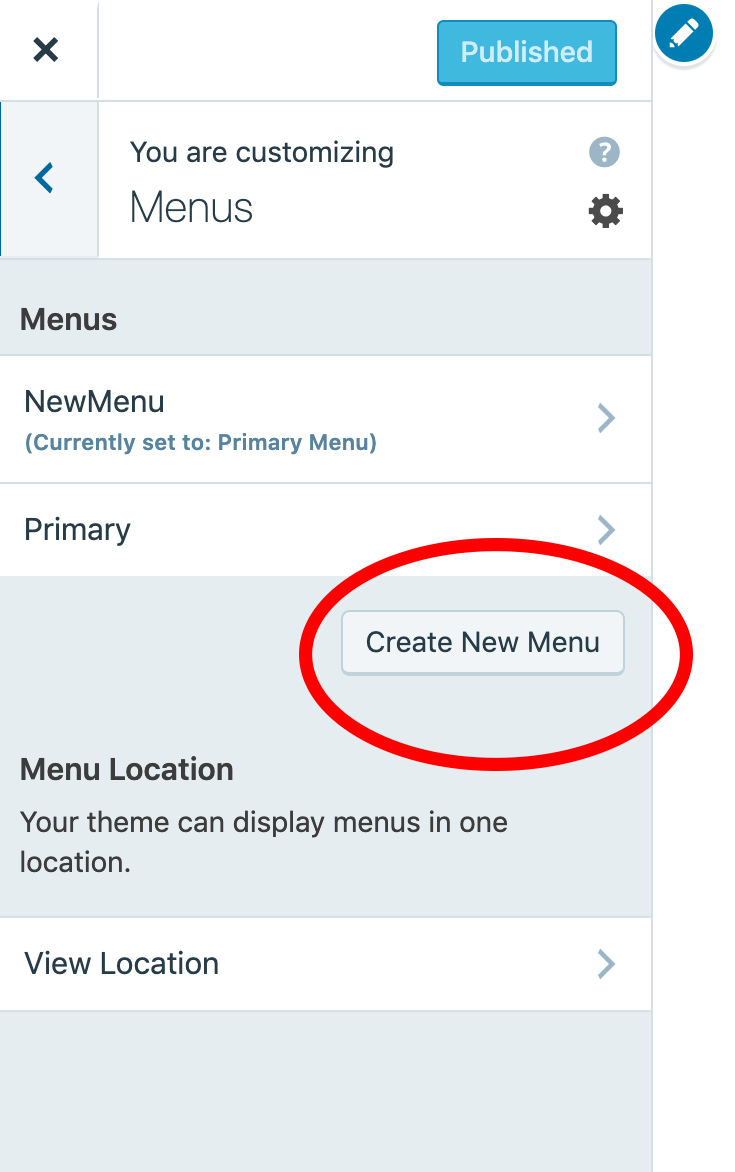
- Menus: Be careful. There’s a blue button that says “Cr
 eate New Menu” and you don’t want to click on it (yet). At this point what you want is a new menu item (not a whole new menu). So just click the “Primary” menu and you’ll see the menu items.
 - The procedure for managing your menus is in section 1.3 (next) and many students find his part perplexing .
What could possibly go wrong?
Photos not showing?
Format — Are you sure you saved your image in the .jpg, .gif or .png formats? The gimp format (.cfx) and photoshop format (.psd) and other formats like the .tiff format wont show up on a web page. The format can be changed by pulling down the dialogue box: In Gimp File/export or in Photoshop File/save as
Size Optimization — Is the image too big? It should be somewhere between 50 and 600 kilobytes. Images that are several megabytes will not load on your web page. Check your image size when you save a document as a jpg and choose the quality of the file. (Better quality means a larger file size, lower quality means it is easier to display on the web).
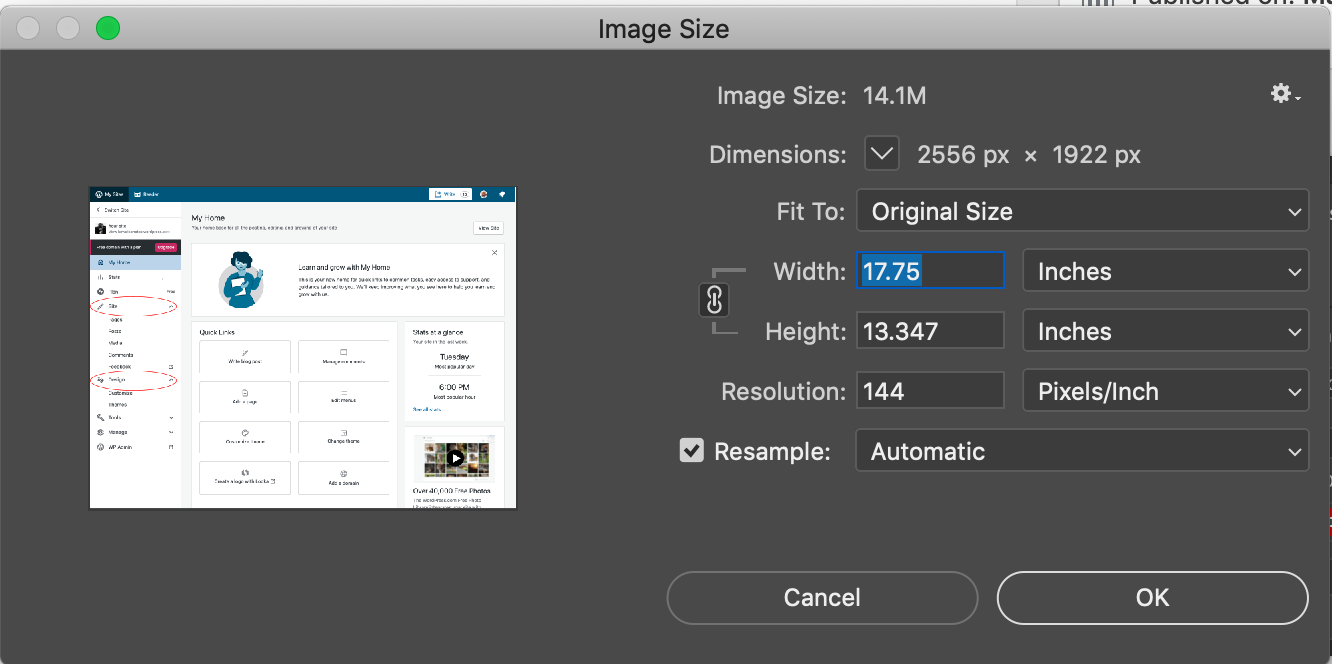
Photoshop: Image / Image Size dialogue box. Its important to keep your images around 500 k or less for the best accessibility.
Here’s the photoshop image size dialogue box. Notice that the file size is 14 mb, which is way too big.
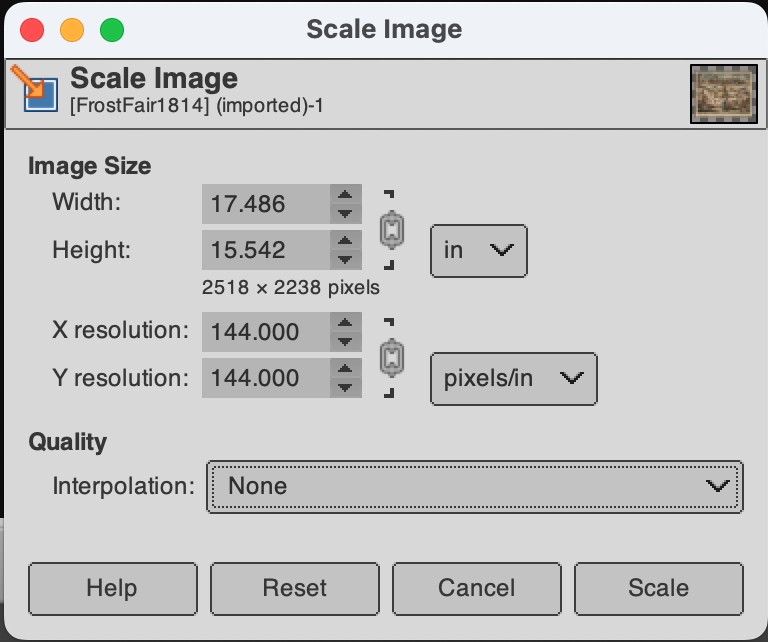
GIMP: Image / Scale Image opens this dialogue box.
You can change this by changing the resolution. First, save your original.
Photoshop: In the “Resolution” area of the Image Size dialogue box, type in “72” (instead of 144) which is the appropriate size for web display. You can also change the dimensions of the file from (in this case) 17.75 inches wide to and 6 inches wide, which makes the height 4.5 inches.
The 14 mb file is now a 411 k file, which is an optimal size for web display.
GIMP: Change the Width and Height to around 5 x 6 and change the X. and Y resolution from 144 to 72. To read the overall size open Image / Image Properties.
WordPress Themes and other notes
-
- You can change “themes” at any time. That’s one of the options in the “Customizer.” If you use a theme that allows a sidebar (like Colinear), you’ll have room for widgets and other interesting items. Then you can select one or two sidebars to the left or right.
- Widgets are another place where photos and text and links may be placed. These are placed from the “Customizer” and can be found in the sidebars and footers.
Other CMS systems
-
- WordPress is open-source CMS software. Anyone can use it any time on any platform.
- WordPress.com is a “freemium” service (free + premium) that uses WordPress CMS software. You start for free and buy add-ons. It’s a good way to learn, but eventually you’ll want to pay a monthly fee for a full service web host.
- WordPress CMS software is available to run on most web hosting services, such as Bluehost, GoDaddy, HostGator, Dreamhost, Amazon and many, many others. This is the usual route for professionals and the cost runs from $8 a month on up.
- Other “freemium” CMS hosting systems you may like, such as Wix.com, blogger.com or squarespace.com They may be useful for simple portfolio presentations, but they lack the flexibility for extensive professional use.
- Other CMS applications, aside from WordPress, include Drupal, ZenCart, Joomla, and others. Many web hosting services also allow you to run other CMS applications.