
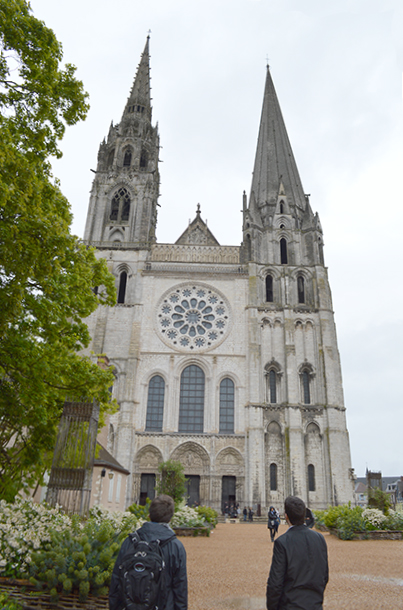
Copy this photo and adjust the perspective.
The perspective warp tool helps correct lens distortion, especially with photos of large scale architecture or landscapes. Here is a photo of Chartres Cathedral that shows lens distortion.
Perspective Warp is a two step process: First we use Layout to set up the grid and we click on the Warp button to let us pull the grid into shape. Look for both buttons at the top level options bar.
So, first, in Photoshop, pull down from the main menu: Edit / Perspective Warp
1 Start with layout. Click on the photo and you’ll see a square with four moveable points at each corner. Move the corner points to the positions that need to be warped.
Then, also in the options bar at the top, click on the “Warp” button and pull the warp into the place you want. (Both are circled in red in the second illustration.
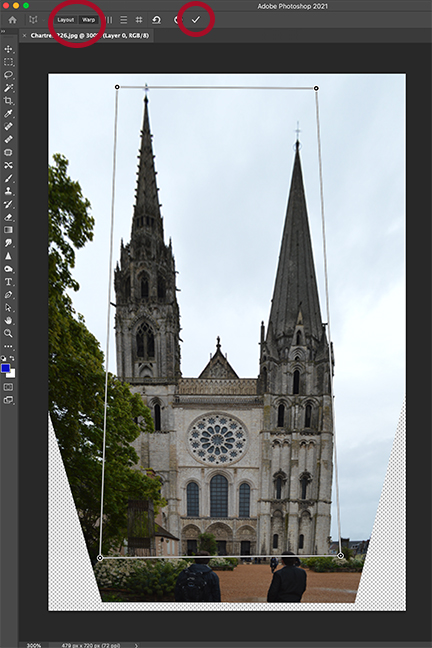
After applying “warp” in Photoshop.
Finally, click the check mark (circled in red) to confirm your perspective warp edit.
You may need to crop the photo or use repair tools to remove blank spaces that were pulled into the warp.
In Gimp, go to the toolbox and find the “Perspective” or “cage transform” tool. The transform square shows up on the image. Click on the top and bottom edges of the square and, using your mouse, pull the shape sideways to minimize lens distortion.
In both PS and Gimp, you may need to crop the photo to remove blank spaces that were pulled into the warp.
Save as Ex 2.4 and place on your web page.