
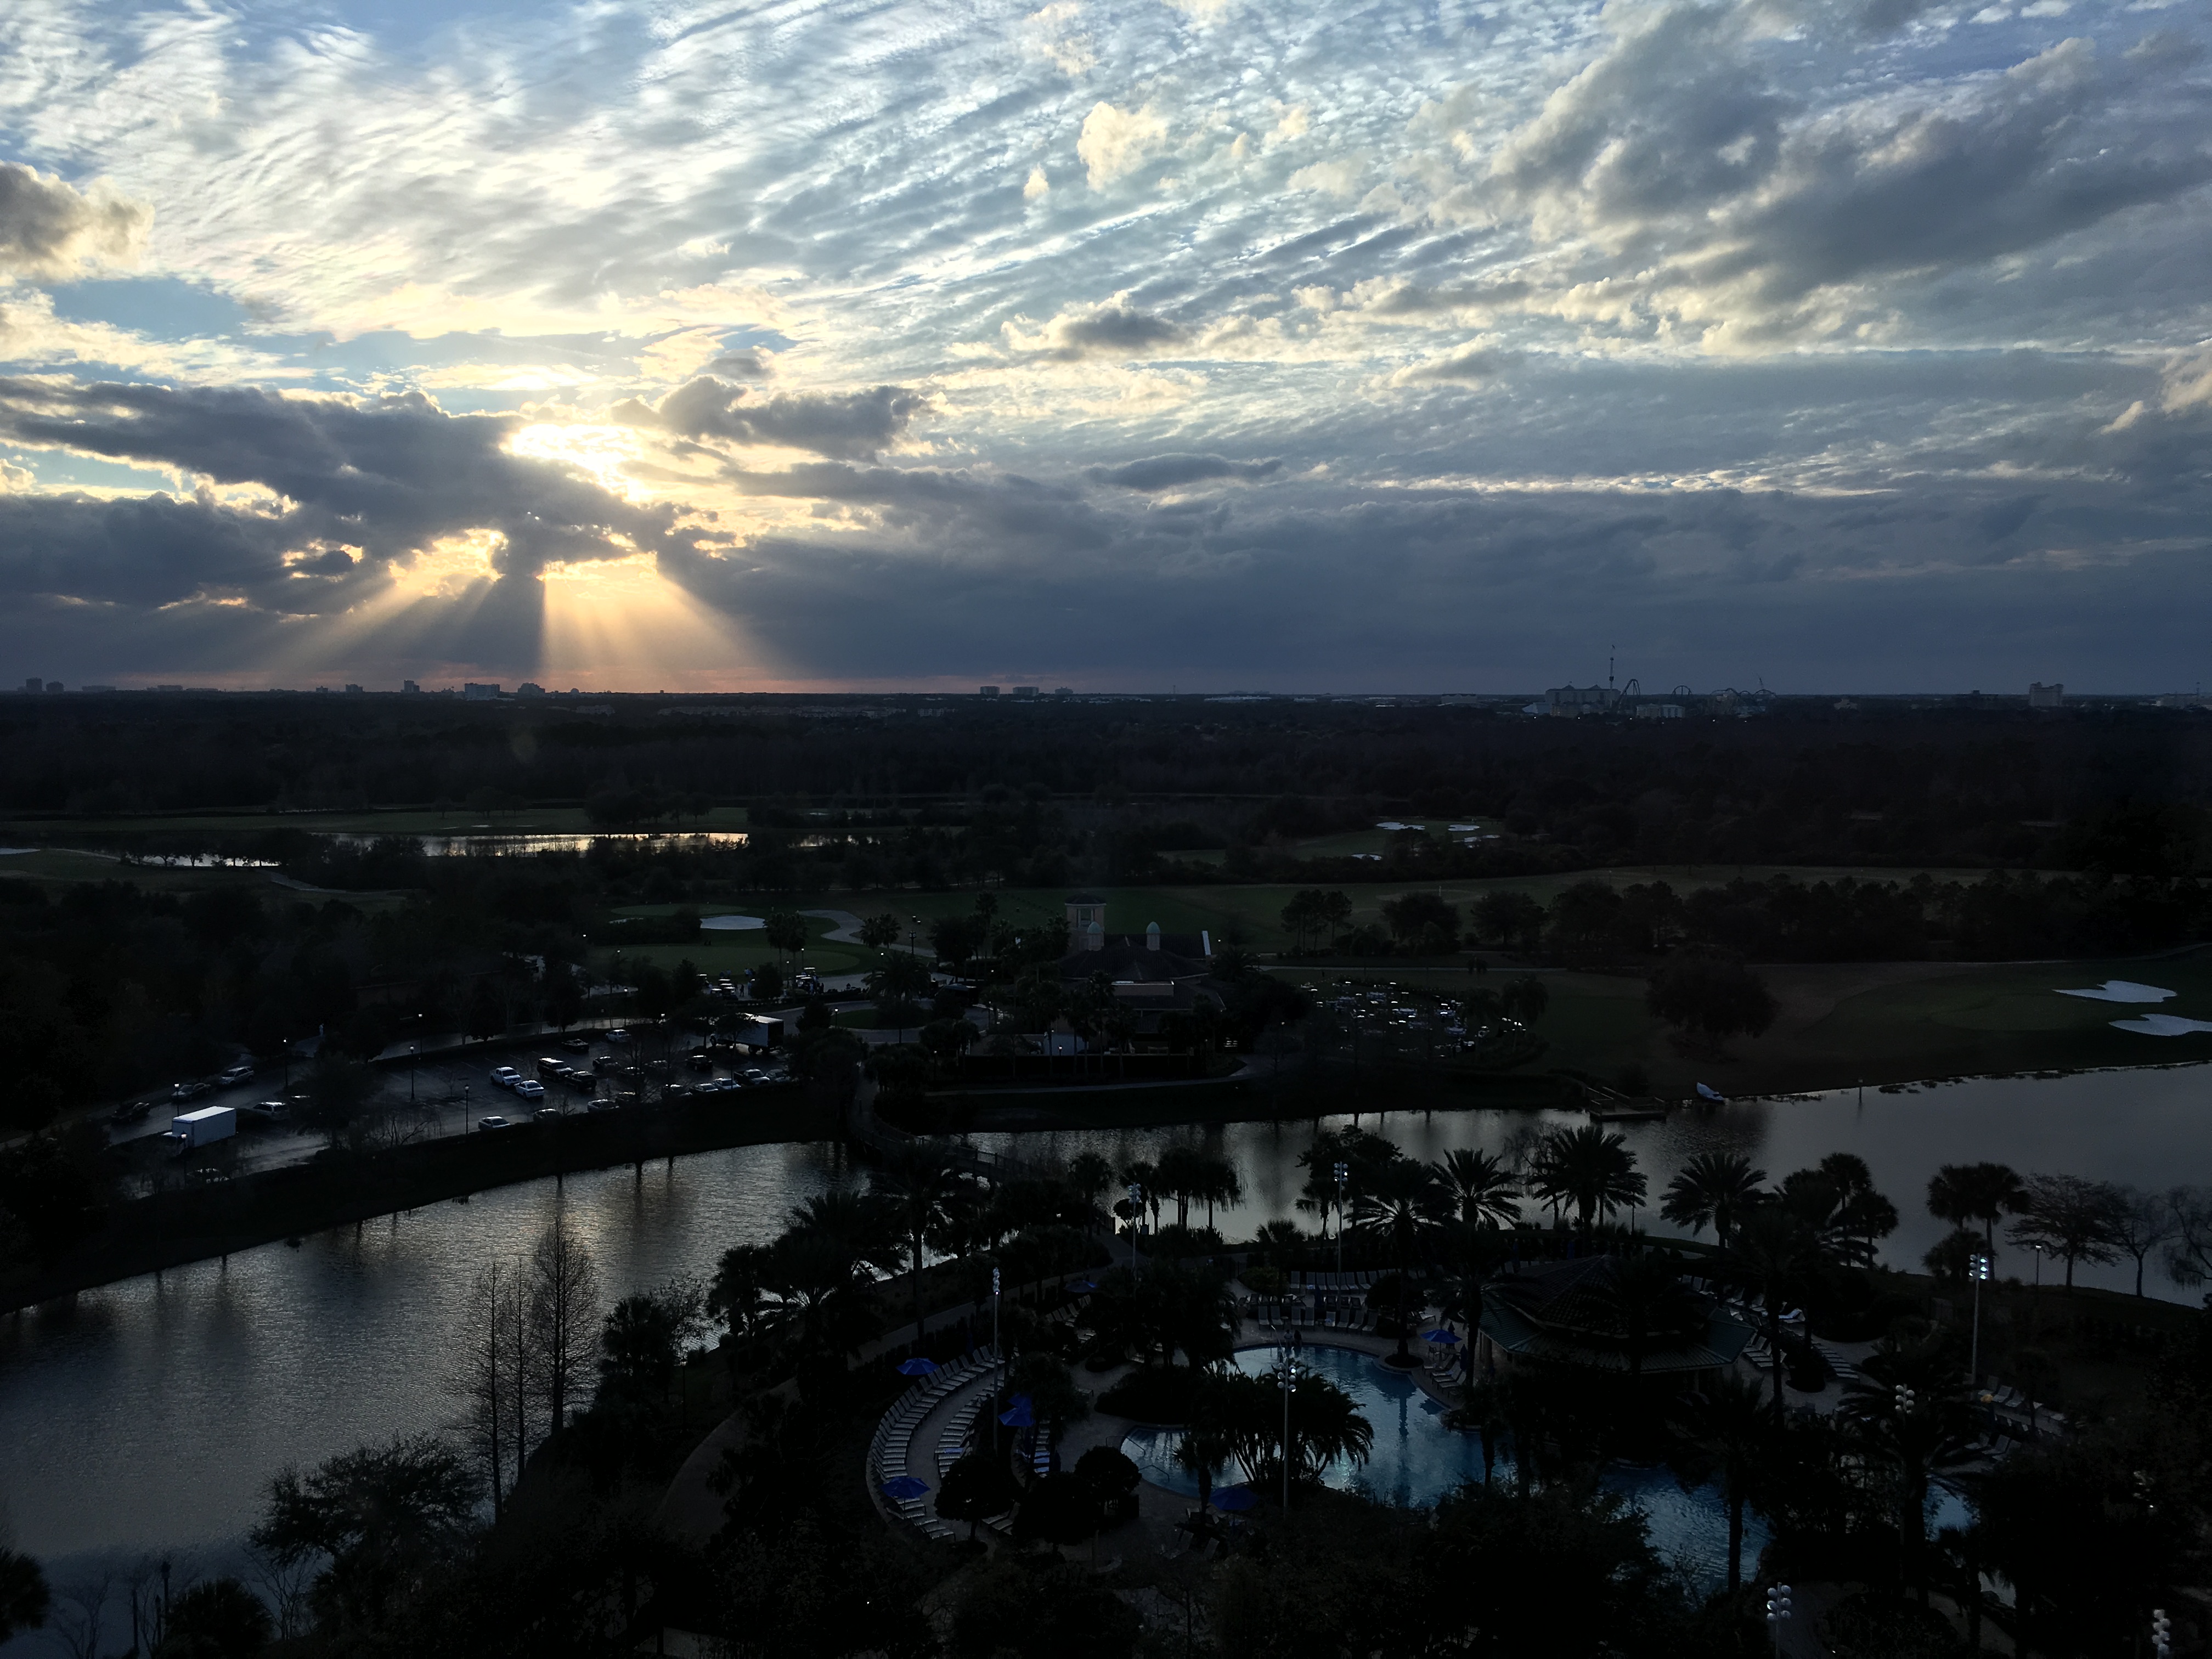
Dealing with high contrast photos is always an issue. This photo was taken in Orlando and you’ll notice that the foreground is hard to see, even though the sunset in the background looks magnificent.
How can we improve the foreground brightness and contrast without taking away from that sunset? One approach is to use separate the layers, treat them differently with the Level Adjust tool, and then reunite the layers. In this photo, we’ll try separating the sky and the land, and then erase the worst parts of each and then merge the two layers back again.
Using Photoshop
- In the Layers pallet, double-click the background layer so that it becomes “Layer zero.”
- In the Layers pallet, right click on the layer to bring up the layers menu, and then Duplicate Layer
- Use Image / Adjust / Level or Shadow-Highlight to get the best for each photo. Turn off the layer visibility command (eyeball) for the upper photo when trying to levelize the lower photo.
- Erase the part of the upper photo that is not levelized.
- Save as a .png, and then export as a .jpg or png. This merges the two layers.
Using Gimp
- In the Layers pallet menu (or the top layers menu), select Duplicate Layer. Now you’ll be selecting each layer by clicking on it, and turn the layers on and off by clicking on the eyeballs.
- The idea here is to adjust the two layers differently and then blend them back together again so you have a good looking sunset and a lighter picture of the pool.
- Turn off the top layer (eyeball) and select the bottom layer (you’ll see the color of the layer change). Then adjust it using the upper menu Colors / Levels command that we used in Assignment 2.3. You should be able to see the swimming pool much better now, but the top – sunset part will look washed out.
- There are a number of steps you can take at this point.
- The easy way is to turn on the top layer visibility, then use the rectangle select tool, place it over the good looking sunset, and Edit / Copy the top part of the top layer. Then turn off the top layer visibility, select the bottom layer, and then “paste in place.” Now turn off the top layer, and you should see that the good looking sunset from the top is pasted over the good looking swimming pool at the bottom. Go to step 6.
- A more meticulous approach is this: In the top layer, bring up the layers menu again and click on Add Layer Mask. When you get the dialogue box, select Black full transparency, then click on the Add button at the bottom. Select the top layer and then use the Erase tool to tak
 e away the lower half of the picture. (You’re not really taking it away, but rather, you’re applying a mask).
- You should have a nicely adjusted top layer with a good bottom layer coming through the mask.
- Save as an .xcf and then export as a jpg or png. This merges the two layers.
Other approaches
Another approach, which tends to give more colorful results, is to take several photos at different exposures and then to merge them together, so that (for example) the clouds and sunset in the background will be as well exposed as the people or objects in the foreground. The Apple iPhone does this automatically in a setting called HDR, for High Dynamic Range. But it does not bring up the highlights in the dramatic way that many HDR photos do.
If you use several separate photos, and open them in Photoshop / File / Automate / HDR Pro, you will combine the best parts of the three overexposed, underexposed, and balanced shots to create a dramatic image with better shadowing and highlights. It is also possible to combine different versions of the same shot, although it’s just as easy to use layer effects to improve sections of the shot in any event.
.