
The idea of this exercise is to change the color of an object without changing colors in the rest of the image. Information about the Photoshop approach is here but honestly it’s quite difficult. Gimp makes this process much, much easier. Let’s start with Gimp.
GIMP Color replacement
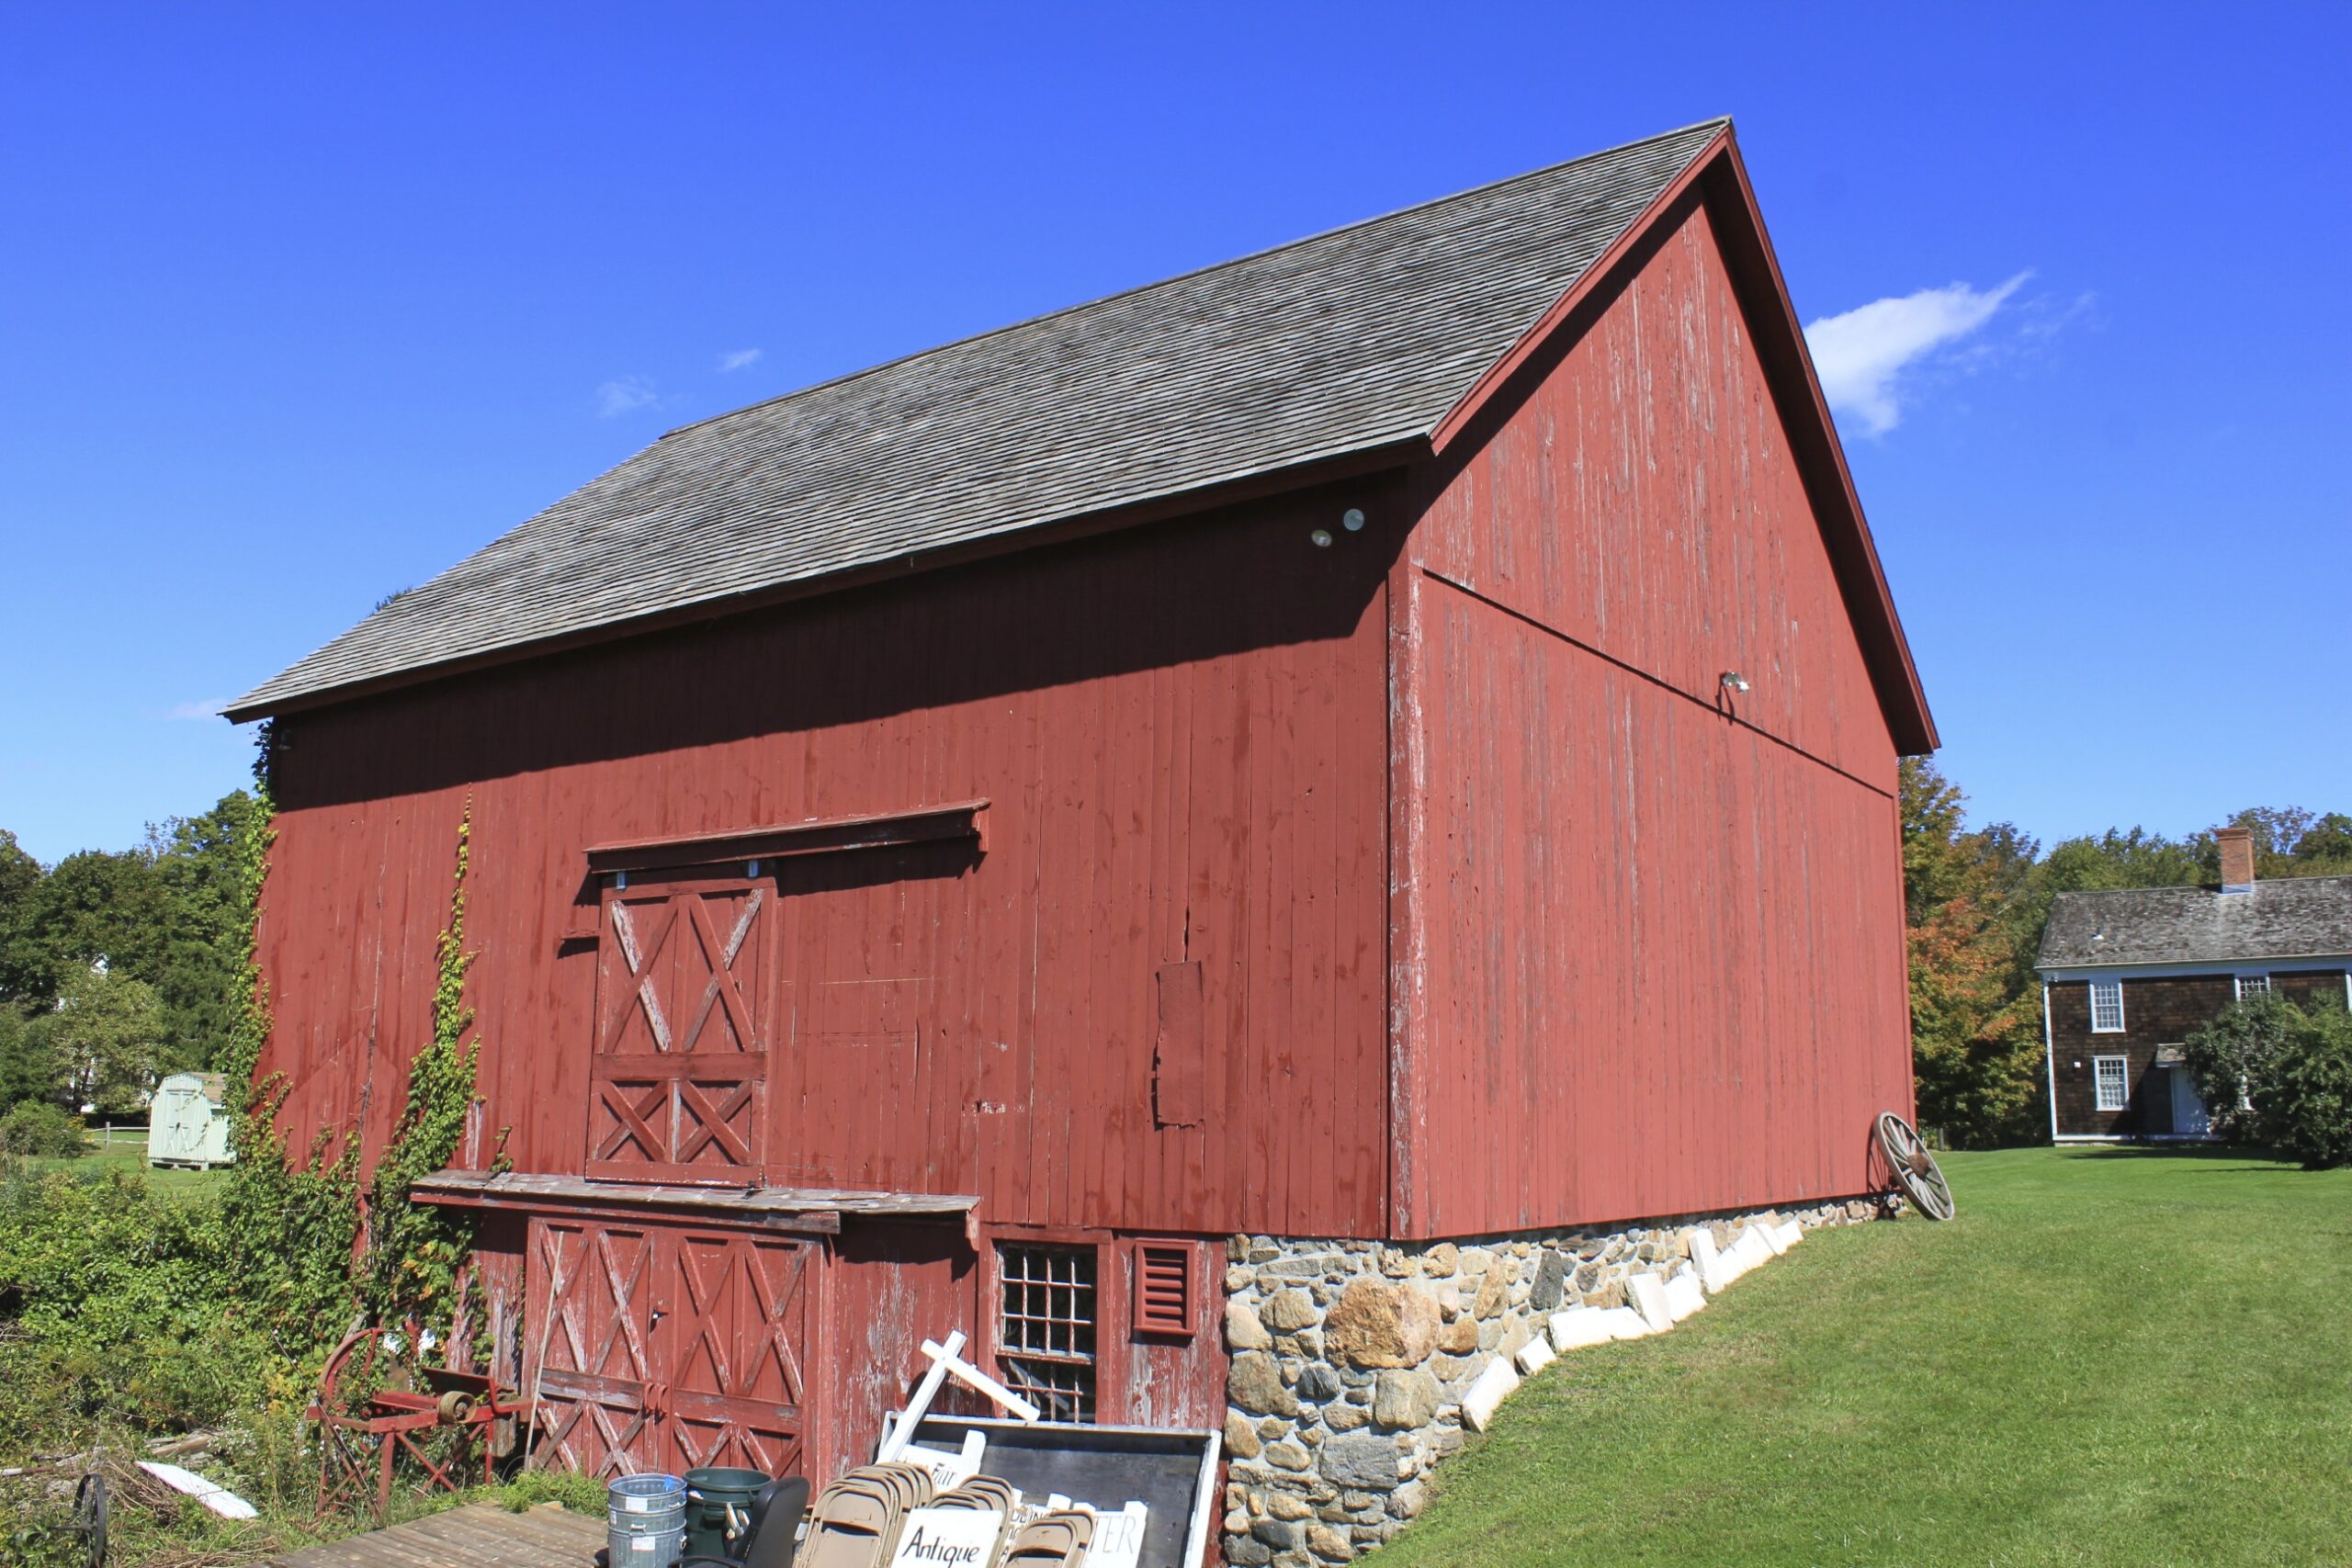
Daniel and Esther Bartlett House. Wikimedia Commons. (With thanks)
- You can select the color to be replaced with the rectangle select tool, but it’s n0t necessary.
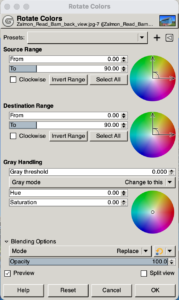
- Now open the “Rotate-Colors Dialog Box” (Colors > Map > Rotate Color)
- This next part is unusual. There are three color wheels with what appear to be “clock hands”. Set the upper clock hands so that they match all red that you want to replace. (eg, the red in this barn)
- Set the lower clock hands to the color that you want to put in its place. (eg, blue)
- Hit “OK”
- Export your freshly painted barn picture to jpg or png format.

PHOTOSHOP & Photopea
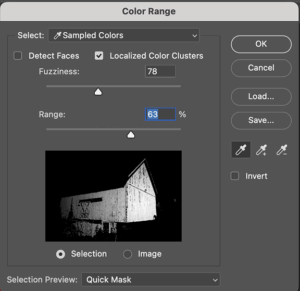
To select for color, use the top Select menu and pull down to Color Range (Select > Color Range). You’ll see this dialogue box pop up. .
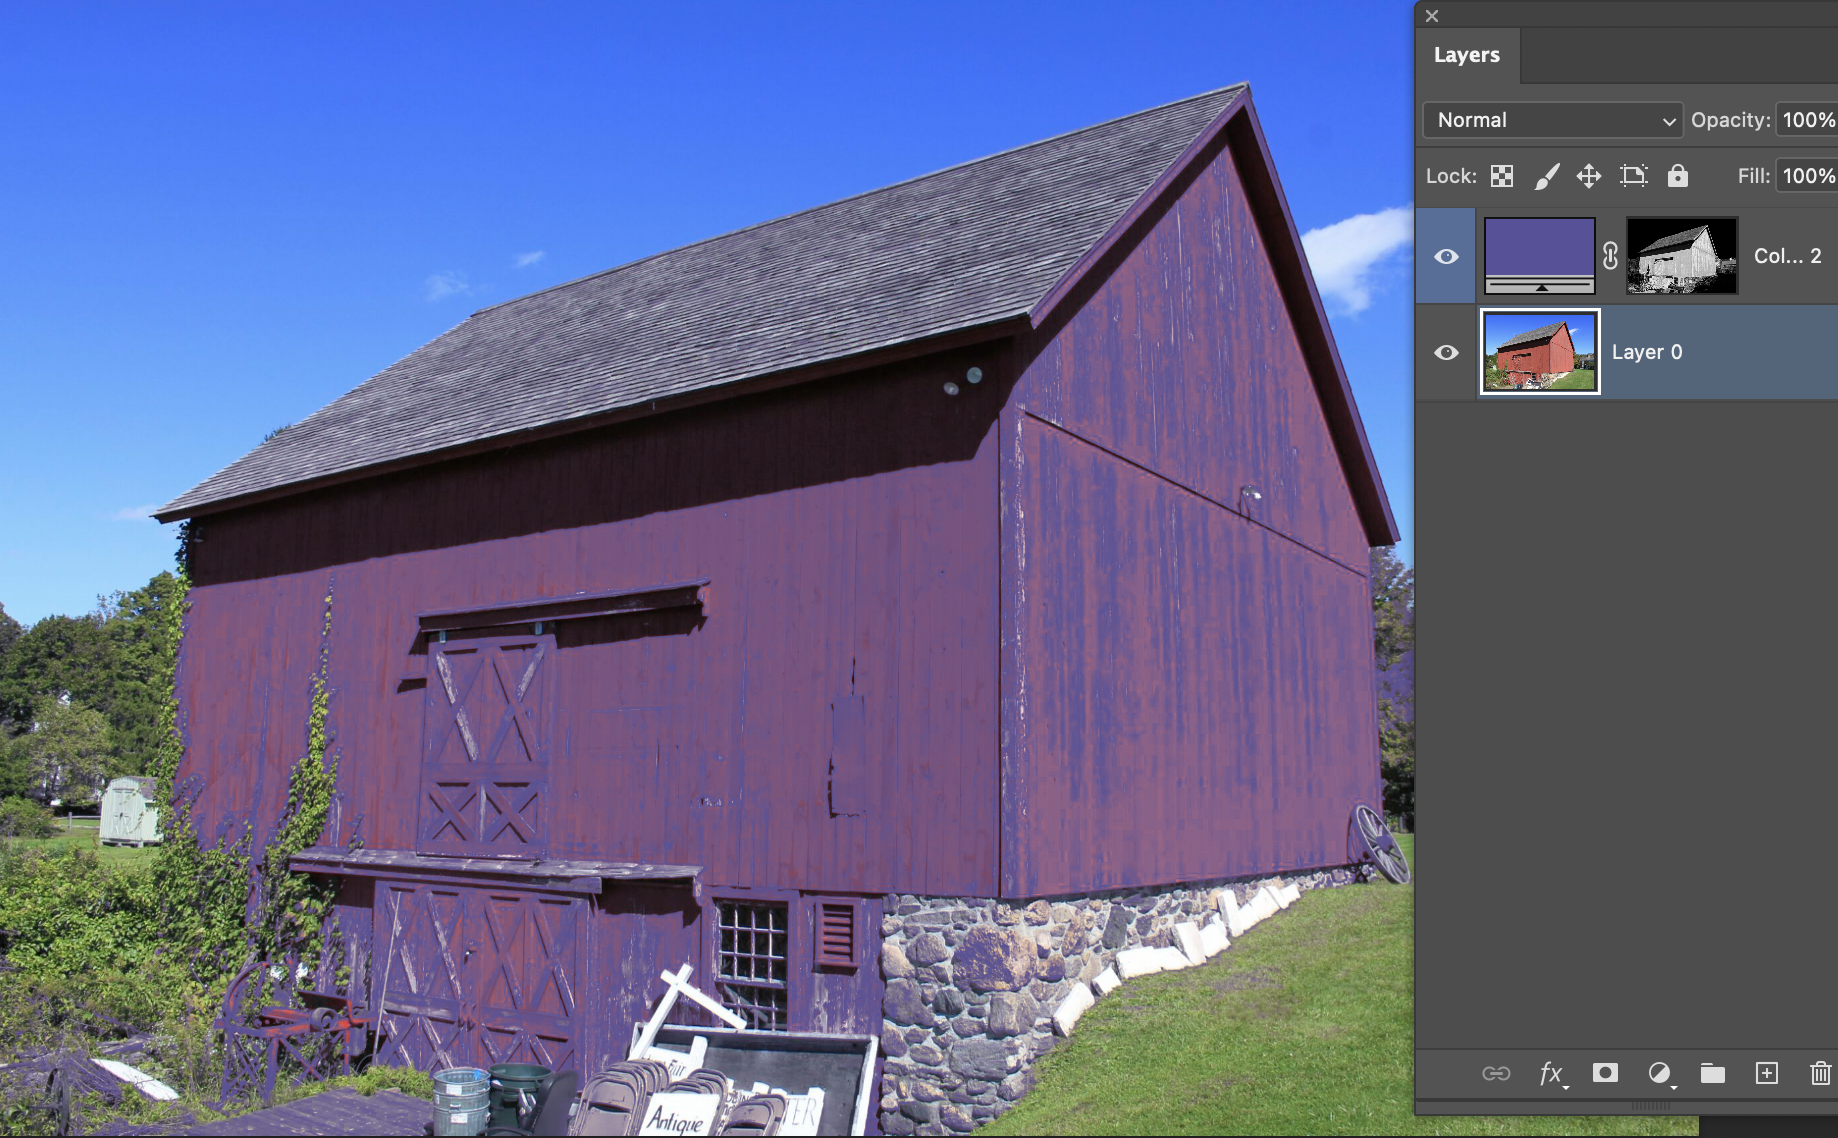
With the red portion of the barn selected, hit OK and you’ll see the selection is still active on the photo. Now open Layer > New Fill Layer > Solid Color and select the color you want. (Here we selected purple.) The object now appears to be filled with that solid color.
With the Color fill layer still selected, open the Blending Modes menu in the Layers panel, and click the Color blending mode. The Color blending mode applies the hue and saturation of the new color but retains the brightness of the original color of the object.
 This may take some fiddling, and there are other color substitution possibilities in Adobe Photoshop, but this gives you the basic approach.
Optional: Create additional effects with adjustment layers
- Click the Create New Adjustment Layer button in the Layers panel, and choose Levels. This adds a Levels adjustment layer.
- Drag the Levels adjustment layer below the Color fill layer in the layer group.
- Use the Input Levels sliders in the Properties panel to brighten up the object. For example, you can drag the white slider to the left to brighten the object and drag the gray slider farther to the left to increase contrast. These adjustments affect the third component of color—brightness—giving the object with its new color the appearance of texture and shading.