
Photoshop and Gimp have excellent tools for repairing photos. Here we will use the red-eye, healing brush and clone repair tools to fix problems with these photos:
- Fix Adobe balloon lady’s red eye (Ex 2.g1, right);
- Repair the scratches on Abraham Lincoln’s photo (Ex 2.g2) and crop out archival artifacts.
- Repair the photo of the two sisters below (Ex 2.g3)
- For an extra credit challenge, fix the Dolly Madison photo below (Ex 2.g4).
Photoshop Repairs 
Redeye — In the Photoshop toolbar ( #7 in the toolbar on this page) is the red-eye tool, which will turn red eyes back into human-looking colors again. Just click and drag the tool around the eyes, then save as a jpg or png.
Healing tools: Also in Photoshop are the paintbrush (#8) and other assorted tools like the pencil. This only paints in one color, but you can hold down the option key and sample color, then release the option key — process that can speed up repairs.
The tools in #7 include “Spot healing brush” which looks like a bandage. It averages all of the pixels inside the brush area and easily covers over thin scratches or small spots.
Other tools include the “healing brush” which samples the color from one area and applies it to another. Hold down the option key and click to set the source, then move the mouse to the destination where repairs are needed.
If you need a tool that completely replaces all elements (not just color), use the the Clone / stamp tool (#9)
GIMP repairs
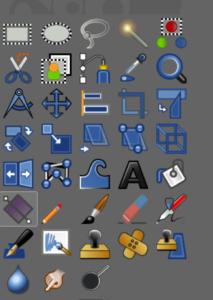
Click through for detailed description of the toolbox.
Redeye – Gimp’s red eye removal tool is in the top menu command Filters / Enhance / Red Eye Removal. Select the eyes using the select tool (otherwise you’ll change the red balloon) and then use the red eye tool. Notice that it has a “threshold” command so that you get all of the red. (Another way to do this is to open the “Channels” layer, turn off the blue and green color channels, and then use the dodge and burn tools on the red layer. Here’s a handy tutorial on the technique.)
Healing tools: The bandage tool is a big help, but unlike Photoshop, it’s a two-step too. We set the source area by holding down the cmd or alt key, clicking once with your mouse, releasing the key, and the holding down the mouse to paint with the source area.
Also useful: the clone stamp tool. Again, hold down your keyboard cmd or option key and click to set the source, then move the mouse to the destination where repairs are needed. Use the sharpen, smudge or dodge tools at the bottom row as well.
Repair exercises
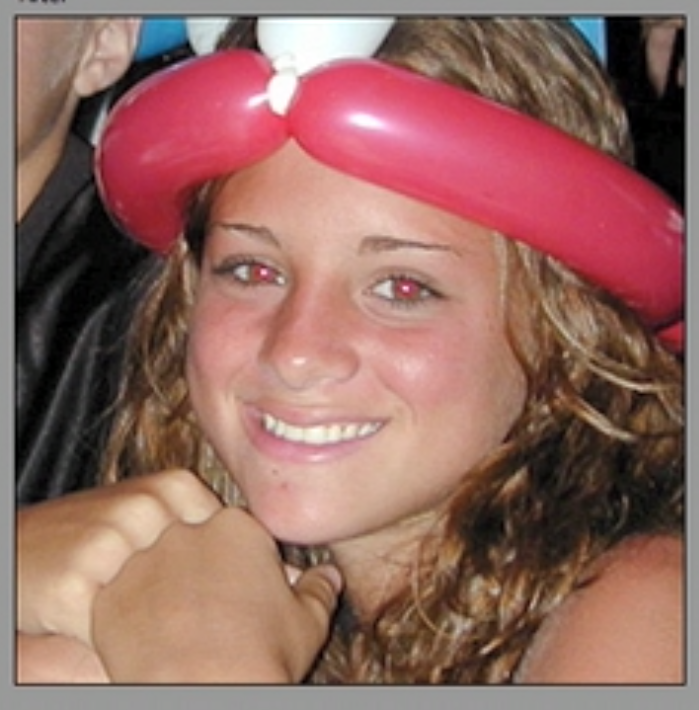 2.g1 Redeye (Adobe photo) Ex 2.g1 — Repair this photo of young woman with the Photoshop or Gimp red eye tool, |
|
 Ex 2.g2 Ex 2.g2 — Repair the scratches on this early 1847 photo of Abraham Lincoln’s and crop out archival artifacts. |
|
 2.g3 Two sisters, Ocean City, 1954. Ex 2.g3 This is a treasured family photo of two sisters in the surf taken at Ocean City, Md, in 1954. Your job: Use the spot healing brush, clone stamp tool and other tools to repair the problems. While you’re at it, use “unsharp mask” and sharpen to improve the focus. Also use the level adjust and color adjust tools to improve the contrast and color. |
|
 Ex 2.g4 extra credit Extra Credit – Dolly Madison 2.g4 This is a Matthew Brady photo of First Lady Dolly Madison taken around 1843. Her husband, James Madison, was president from 1809 to 1817. The photo was badly scratched, so it needs healing brush tools. As a special problem, there is a big ugly splotch over the right side of her face (or left side as we view it). The approach we use here is to copy a section of her mouth and nose from the right side of her face, paste it into a new layer, flip it, and move it into place over the big splotch. Then use the PS perspective warp or Gimp cage transform tools on that layer to adjust her smile. Merge the layers (use the layers menu) and then File / Export as a jpg. |
Place repaired versions of 2.g1, 2.g2, and 2.g3 (and 2.g4 if you like) in a gallery format on your web site.
MORE
- Adobe Retouch & Repair information