
The basic strategy when you learn to use a software application is to start with simple exercises and then work towards more complicated things. Here we will create a text meme (2a) and an image meme (2b). Then we will upload them to your web pages and to other social media.
2.2.A Text meme
The first meme will be an image file with any short text content you like. It could be a meme encouraging people to vote or it could be a favorite inspirational quote. It will have white text on a color background. Search for an idea or a poem or a quote. Here we’ll use something from Lord of the Rings:
“All we have to decide is what to do with the time that is given us.”
This is 16 words and 66 characters, which is about the right length of text for engagement, according to social media experts.
Size: Standard sizes for memes and internet advertising are here at the Internet Advertising Bureau. Choose between leaderboard (728 pixels wide by 90 pixels high) and smartphone banner (320 x 50).
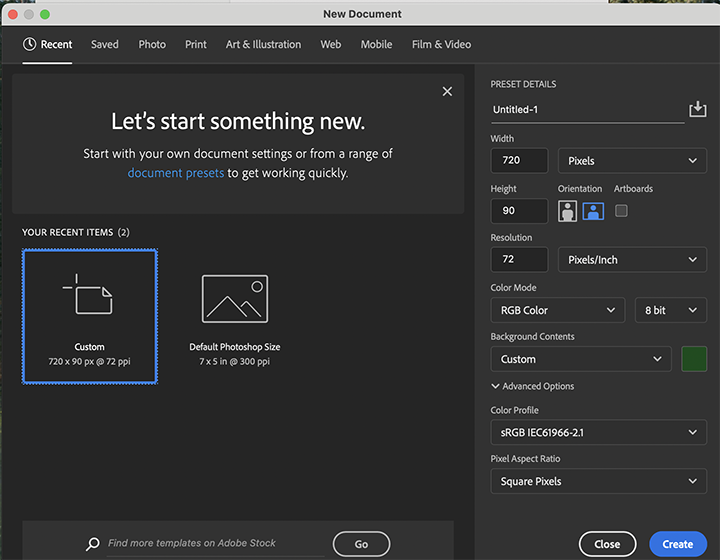
Step 1 – Create a new image file
Step 1 Open Adobe Photoshop, pull down from the top “File” menu and select some of the options. We want to create a new leaderboard size file, so first make sure that the measurement units you are specifying are pixels, and not inches. You may have to pull down the units menu to find pixels. Now enter 728 width and 90 height.
Also select the color of your leaderboard. Here we are using green, which we specified by clicking on color picker and selecting a color we like. Now click on the big blue “crate” button. That takes you to the setup page.
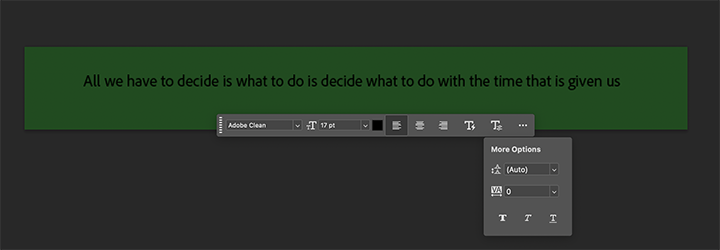
Step 2 – place text on your leaderboard
Step 2 You’ll see a wide green bar on your screen and lots of menus. The main toolbar menu is usually to your left, and you begin placing text with the text tool “T”. (See “Image editors” on this site for more about Photoshop men us).
Click on the text tool and then click on the big green bar, and you should be able to type your text in. Its a good moment to stop and check for typos or errors.
The text is probably not yet the color you want, so once you get your text in you’ll want to change it to white. So to change type color, sweep the cursor across the selection and it should be highlighted. Then you can click on the color box on the text sub menu and change it to white.
You’ll also want to use the sub-menu to make other changes to the font or to some of the characteristics (bold, italic), and to the positioning (T with lightning bolt) and leading and kerning (last T on the sub menu).
Leading is the space between lines. Kerning is the space between letters.
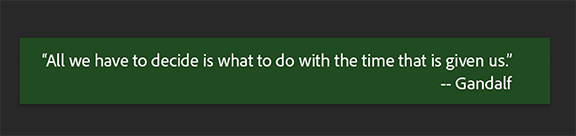
Step 3 – Position the text
Step 3
Notice that the letters fit the space comfortably. The composition is not too tight or too loose.
Notice also that the text is “sans serif” type. This is more modern looking and easier to read in a headline, but serif text is easier to read in body text.
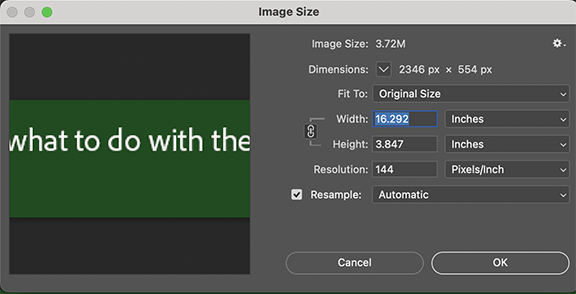
Step 4 – Image size dialogue box
Step 4 – Save the Photoshop .psd file, then optimize the size and format for the web.
From the top menu, open the “Image” column and select the “Image Size” dialogue box. Here we see the size is 3.72 M (megabytes). That’s too big for a web page or social media. The optimal size we need is 200 to 800 K (kilobytes). So here we change the Width from 16.2 to 8 inches (the Height changes automatically if the two are linked as shown by the chain). Let’s also change the the Resolution from 144 to 72. Now our image size is around 230K.
Now “save as” a .jpg or .png.
Note: When you save or export to a web format, the image is flattened and you can’t go back and edit the text or images in the layers. So its a good idea to save first in original formats and then secondly to “save as” in web formats. That way you can go back and edit your original .psd file.
2.2.b. Image meme
Let’s create a new file using a few colored shapes in Photoshop and in Gimp.
Adobe Photoshop
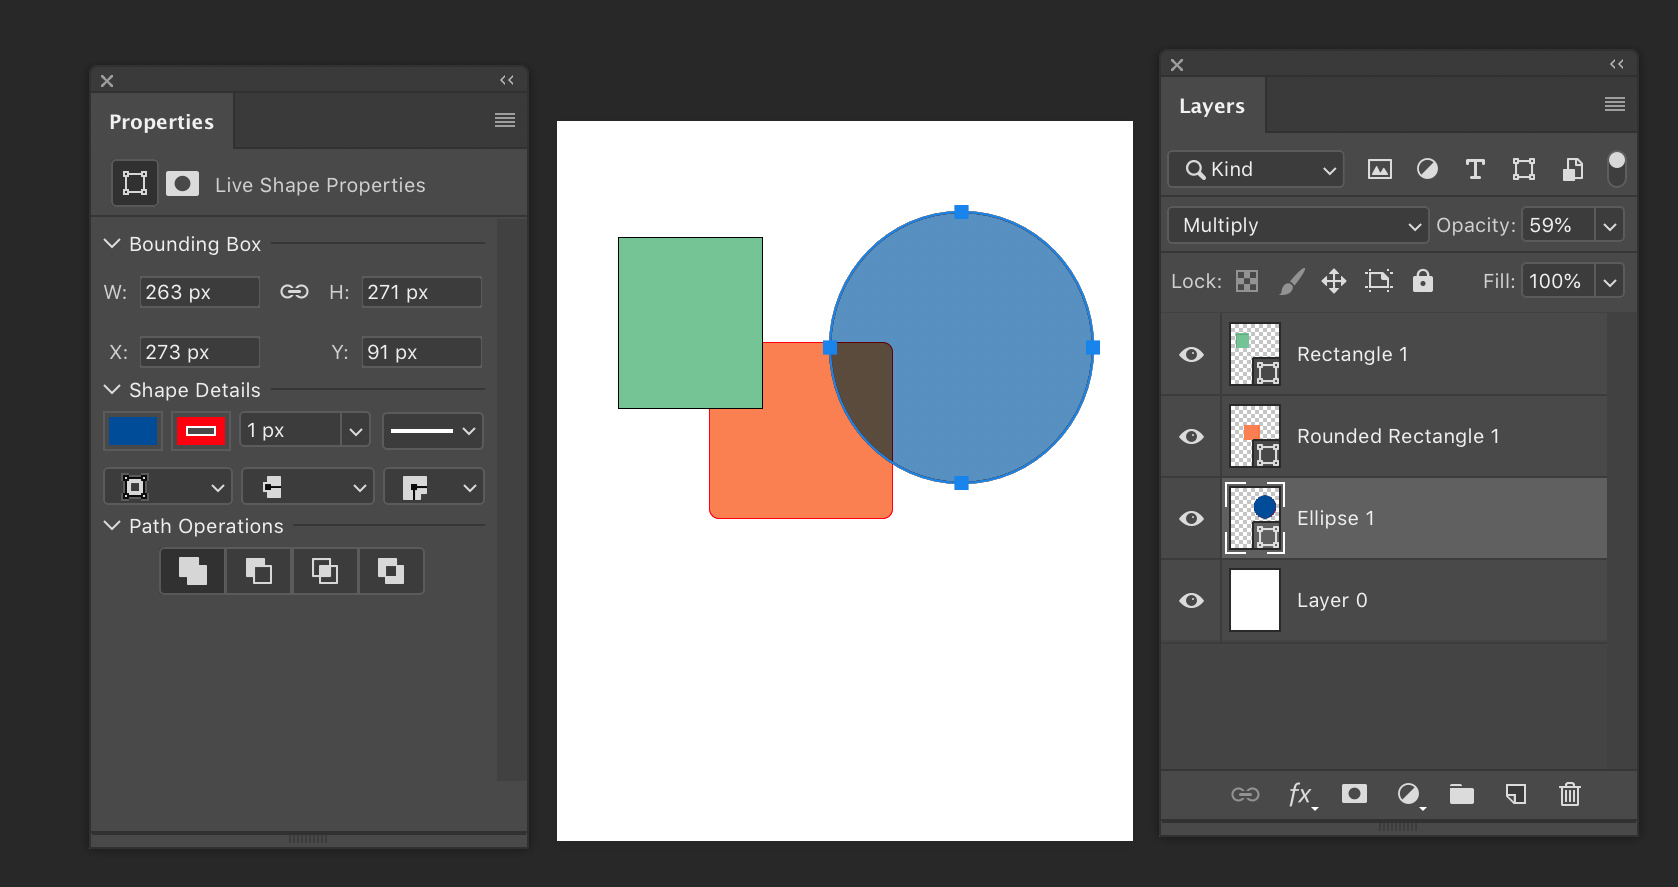
Photoshop with layers pallet (right) and size and color pallet (left).
- Open Photoshop and create a new 5 by 5 image with a Resolution of 72 pixels per inch.
- Find the shape tools and place three or four shapes on the page.
Each time you do this a new layer is created. - Notice that you can change the colors using the properties pallet.
- Also notice that the the way shapes stack on the layers pallet. You can move the layers around and you can select different blend modes and opacities. The image you turn in should have blended layers and one layer with lower opacity, like this one.
- Save as a .psd to preserve layers
- Save as a jpg of 500 kb or less and upload to your portfolio
Gimp – Gnu Image Manipulation Program
- Create a new file: 5h by 5w with 72 pixels per inch resolution.
- Use the select tool in the upper left hand corner of the tool bar. Draw a simple square. (There is no shape tool, as in Photoshop).
- Select a foreground color
- Use the paint bucket tool to fill in the color.
- Use the opacity slider in the layers menu (lower right) to adjust the opacity.
- Create several other squares or ovals of different colors and opacities. Notice that the the way shapes stack on the layers pallet. You can move the layers around and you can select different blend modes and opacities. The image you turn in should have blended layers and one layer with lower opacity, like this one.
- Export as a jpg of 500 kb or less and upload to your portfolio pages.
More
- Shape tools and Gimp
- Create a simple floating logo in Gimp
- Digital flyers for Radford University tele-screens:
- Landscape (horizontal) not portrait (vertical) orientation
- Document Size: width 1280 height 720
- Dark background with lighter lettering
- Save as jpg (from Photo editing application) or pptx (from Powerpoint)