
Copy this photo and adjust the perspective.
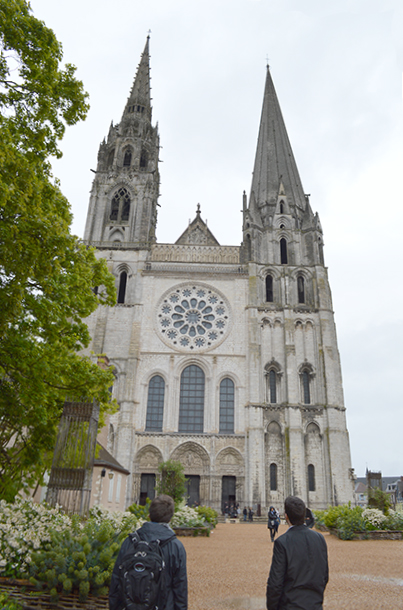
The perspective warp tool helps correct lens distortion, especially with photos of large scale architecture or landscapes. Here is a photo of Chartres Cathedral that shows lens distortion.
The way to correct this is a process called perspective warp.
Photoshop
Adobe Photoshop has a two-step process, but there can be problems with this tool.
First, double-click the Background layer in the Layers panel. Double-clicking removes the lock and opens a dialog box where you can rename the layer. Now it is a regular, editable layer named “Layer 0”.
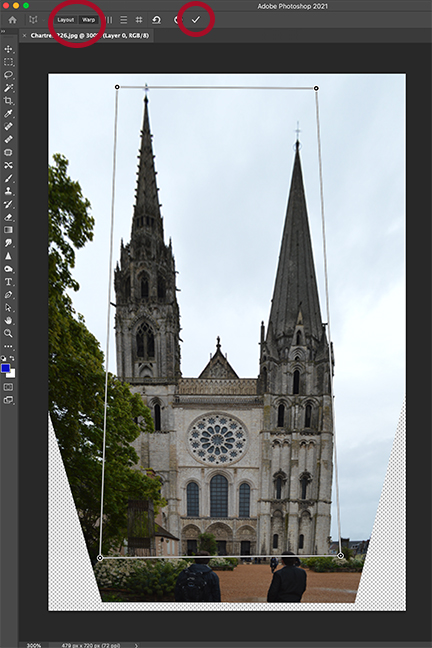
To adjust the perspective, pull down the Edit / Perspective Warp command from the top menu.
Next, right-click on your image and you will see a perspective warp grid icon with buttons on the corners. Pull the buttons to the sides until they align with the edges of your image.
Above the image, you should see an Options bar that looks like this:
![]()
Notice that the “Layout” button is active. Now, once your grid is in place, push the “Warp” button and pull the grid into the shape you want.
(Both are circled in red in the second illustration.)
After applying “edit / warp”
Finally, click the check mark (circled in red) to confirm your perspective warp edit.
You may need to crop the photo or use repair tools to remove blank spaces that were pulled into the warp.
——–
![]()
One problem is that the Photoshop toolbar icon for perspective warp (left) does not work the same way as the top menu command in some versions of Photoshop. The toolbar perspective warp can be used like a cropping tool (and in fact it is located under the cropping tool). So just click at the points that will be the new corners and then click off the tool or hit return. One problem with this tool is that you don’t see the “live” changes and it’s difficult to make adjustments.
—–
GIMP and Perspective Warp
Perspective warp is one area where Gimp, the free application, is far superior.
With Gimp, go to the toolbox and find the “Perspective” or “cage transform” tool. The transform square shows up on the image right away.
Click on the top and bottom edges of the square and, using your mouse, pull the shape sideways to minimize lens distortion. You don’t have to change from “layout” to “warp” mode with Gimp. It’s a one-step process.
In both Photoshop and Gimp, you might need to crop the photo to remove blank spaces that were pulled into the warp.
Save as Ex 2.4 and place on your web page.